In the summer of 2013 my brother Dan and his wife Bekie told me and that they were having a baby. I couldn’t have been more excited to hang out with my new nephew or niece and teach them everything I know. A couple months down the road and I found out it was going to be a little boy. Talking with my wife Megan I told her I wanted to build my nephew something cool that he could use throughout his childhood. As we talked she told me that a member of her family built her a toy box that she had used and passed along to all her younger brothers (Currently that toy box is in our daughter’s room). I tried to think of a good theme or a special touch that I could add to this toy box that would set it apart from the rest. During my brainstorming process I made a list of all the toys or shows that my older brother and I loved as kids that have made a come back over the recent years: Transformers, Ninja Turtles, Lego, and Star Wars all came to mind. My brother Dan has always loved Legos. Even as an adult when buying birthday presents or Christmas presents for his nephew or friends’ children, he always gets them Legos. Although I am a bigger Star Wars and Harry Potter nerd than Lego I realized that I got my passion for building from Lego and Lincoln Logs. At this point I made the decision to try to conquer the feat of making a large toy box, that on the outside looks like a Lego.
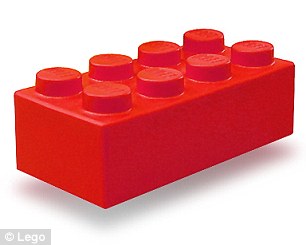
Next was to decide what Lego and color I planned on replicating. A quick search online helped narrow the field of bricks I had to choose from. I decided to go basic with eight dot rectangular brick. Color was still undetermined at this point in the build.
So, I had to make a plan to create a large toy box that from the outside looks like the Lego above but has the features of a toy box and at the same time is safe for a child. I have never made a toy box or child proofed anything so I had to do some research on how to achieve this and still make it look like a clean simple Lego brick.
Here I started by cutting the sides and top, then making all the sides even.

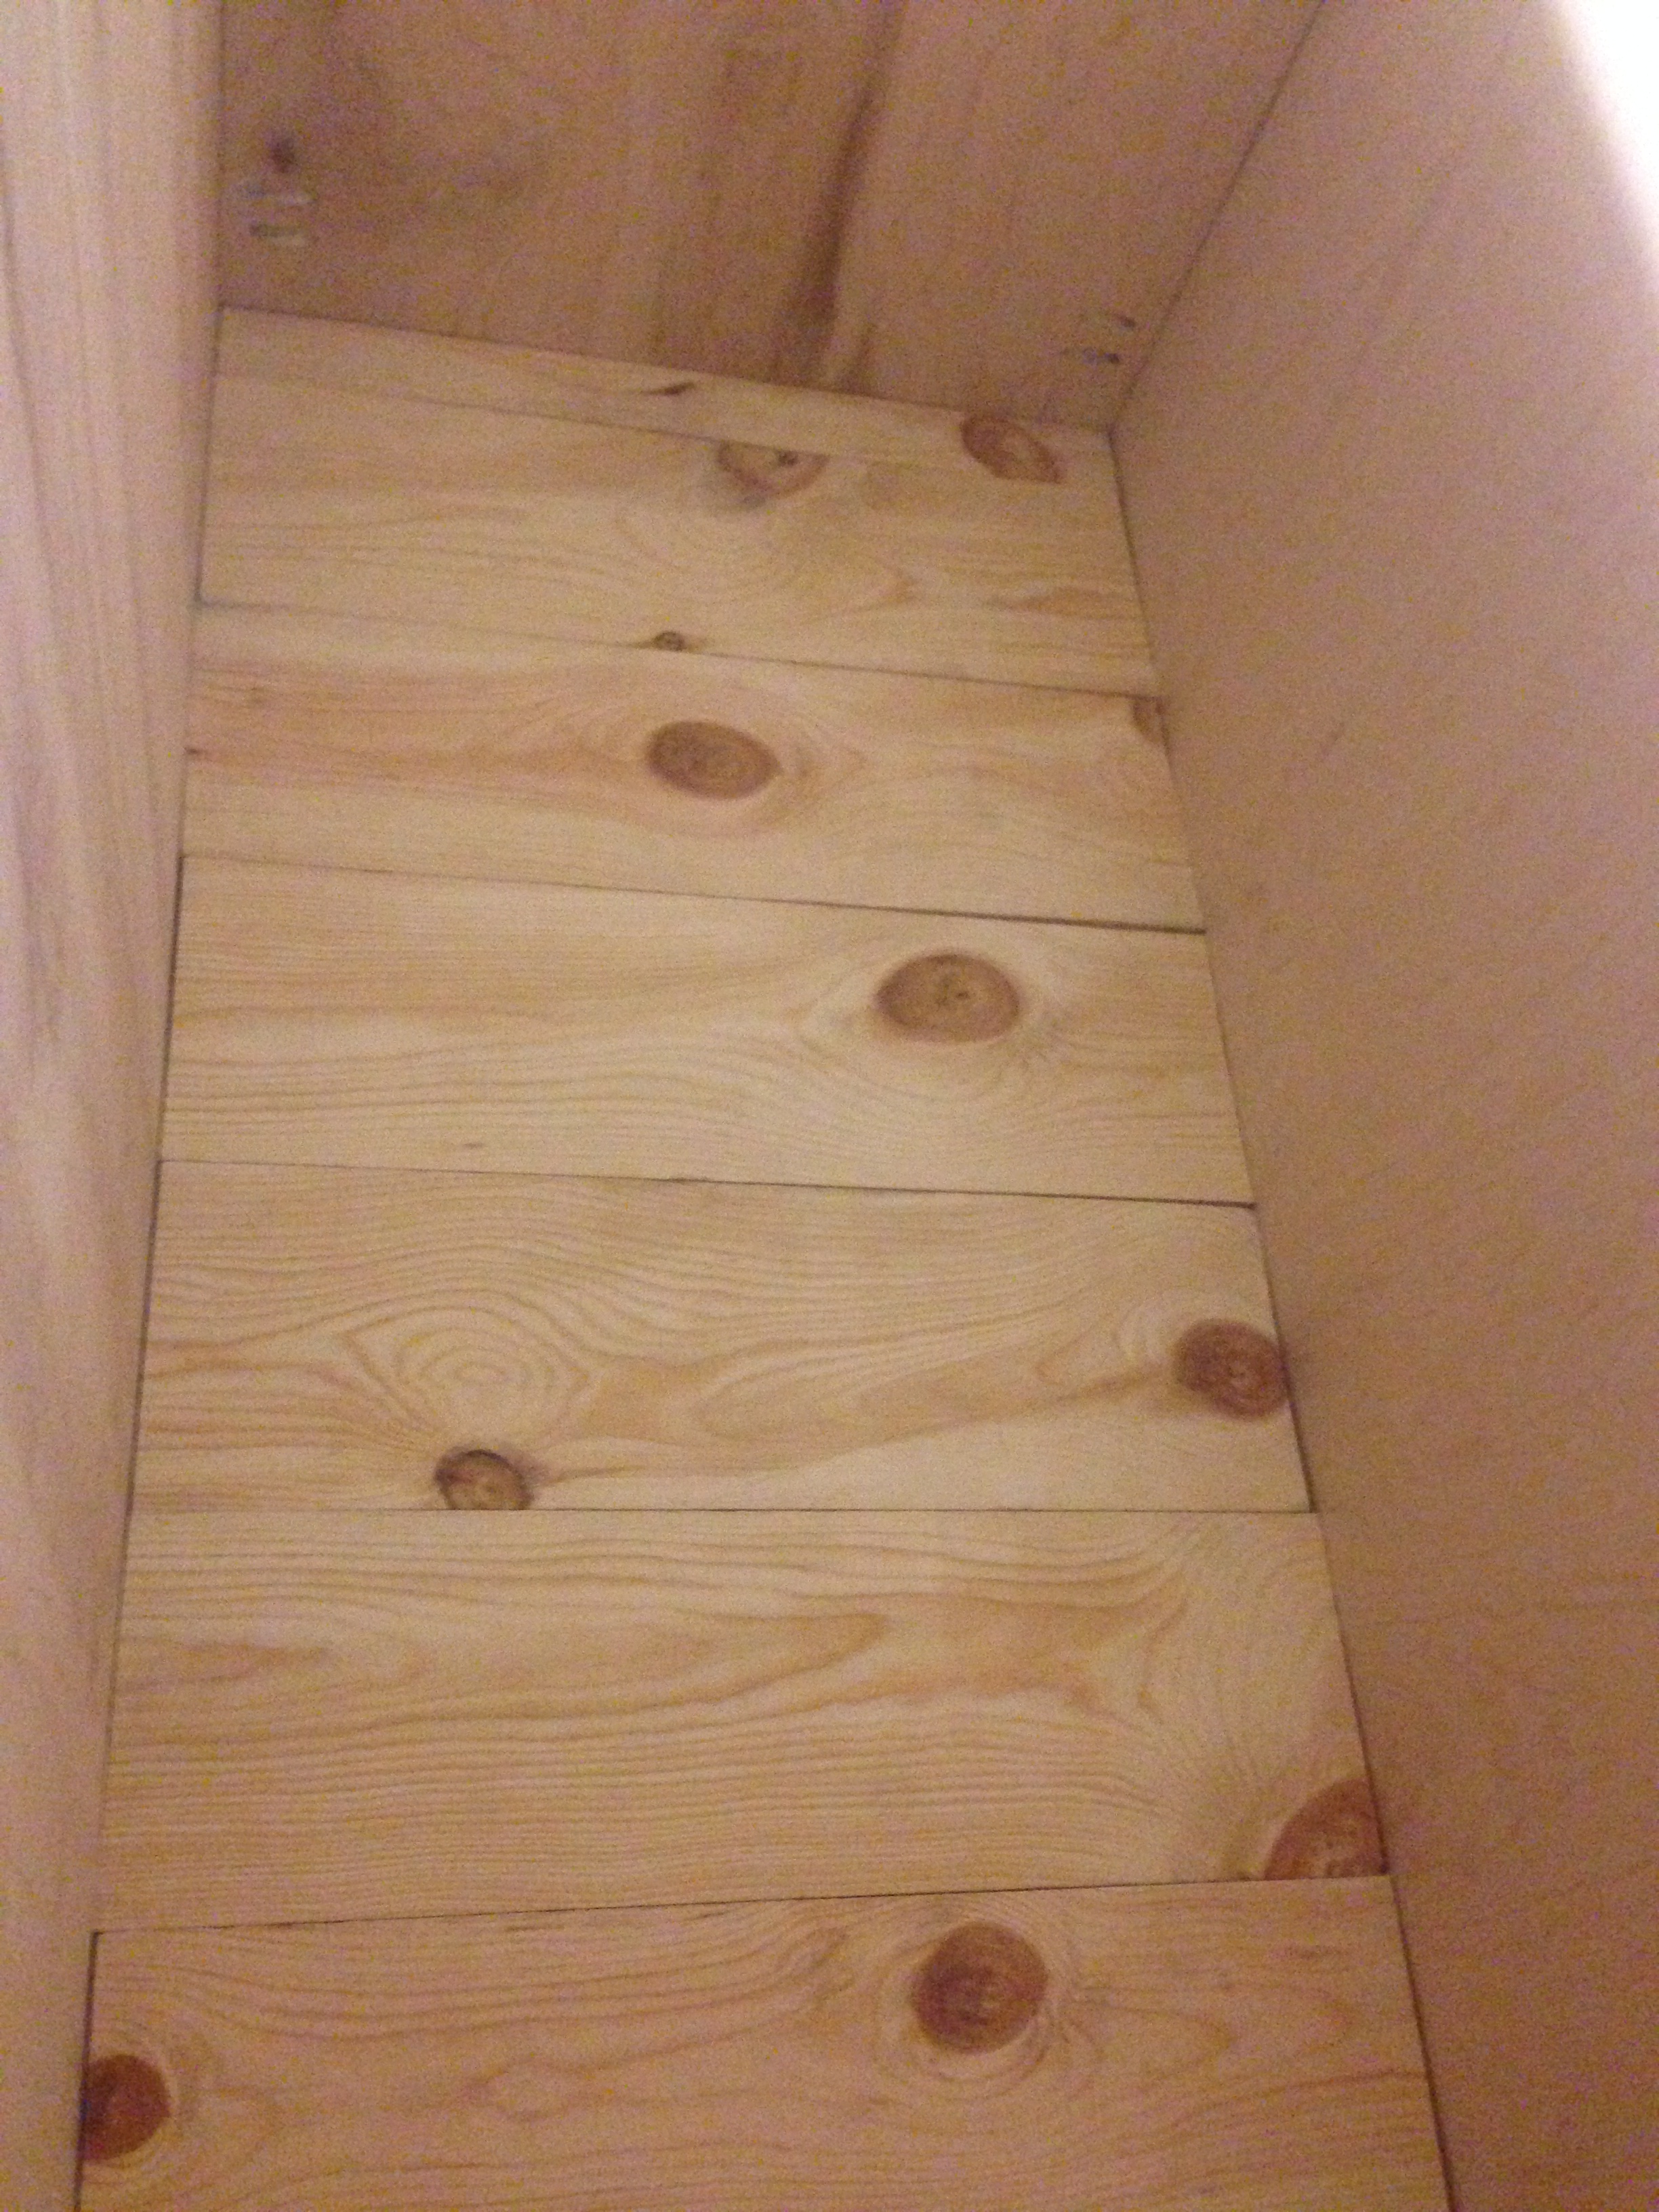
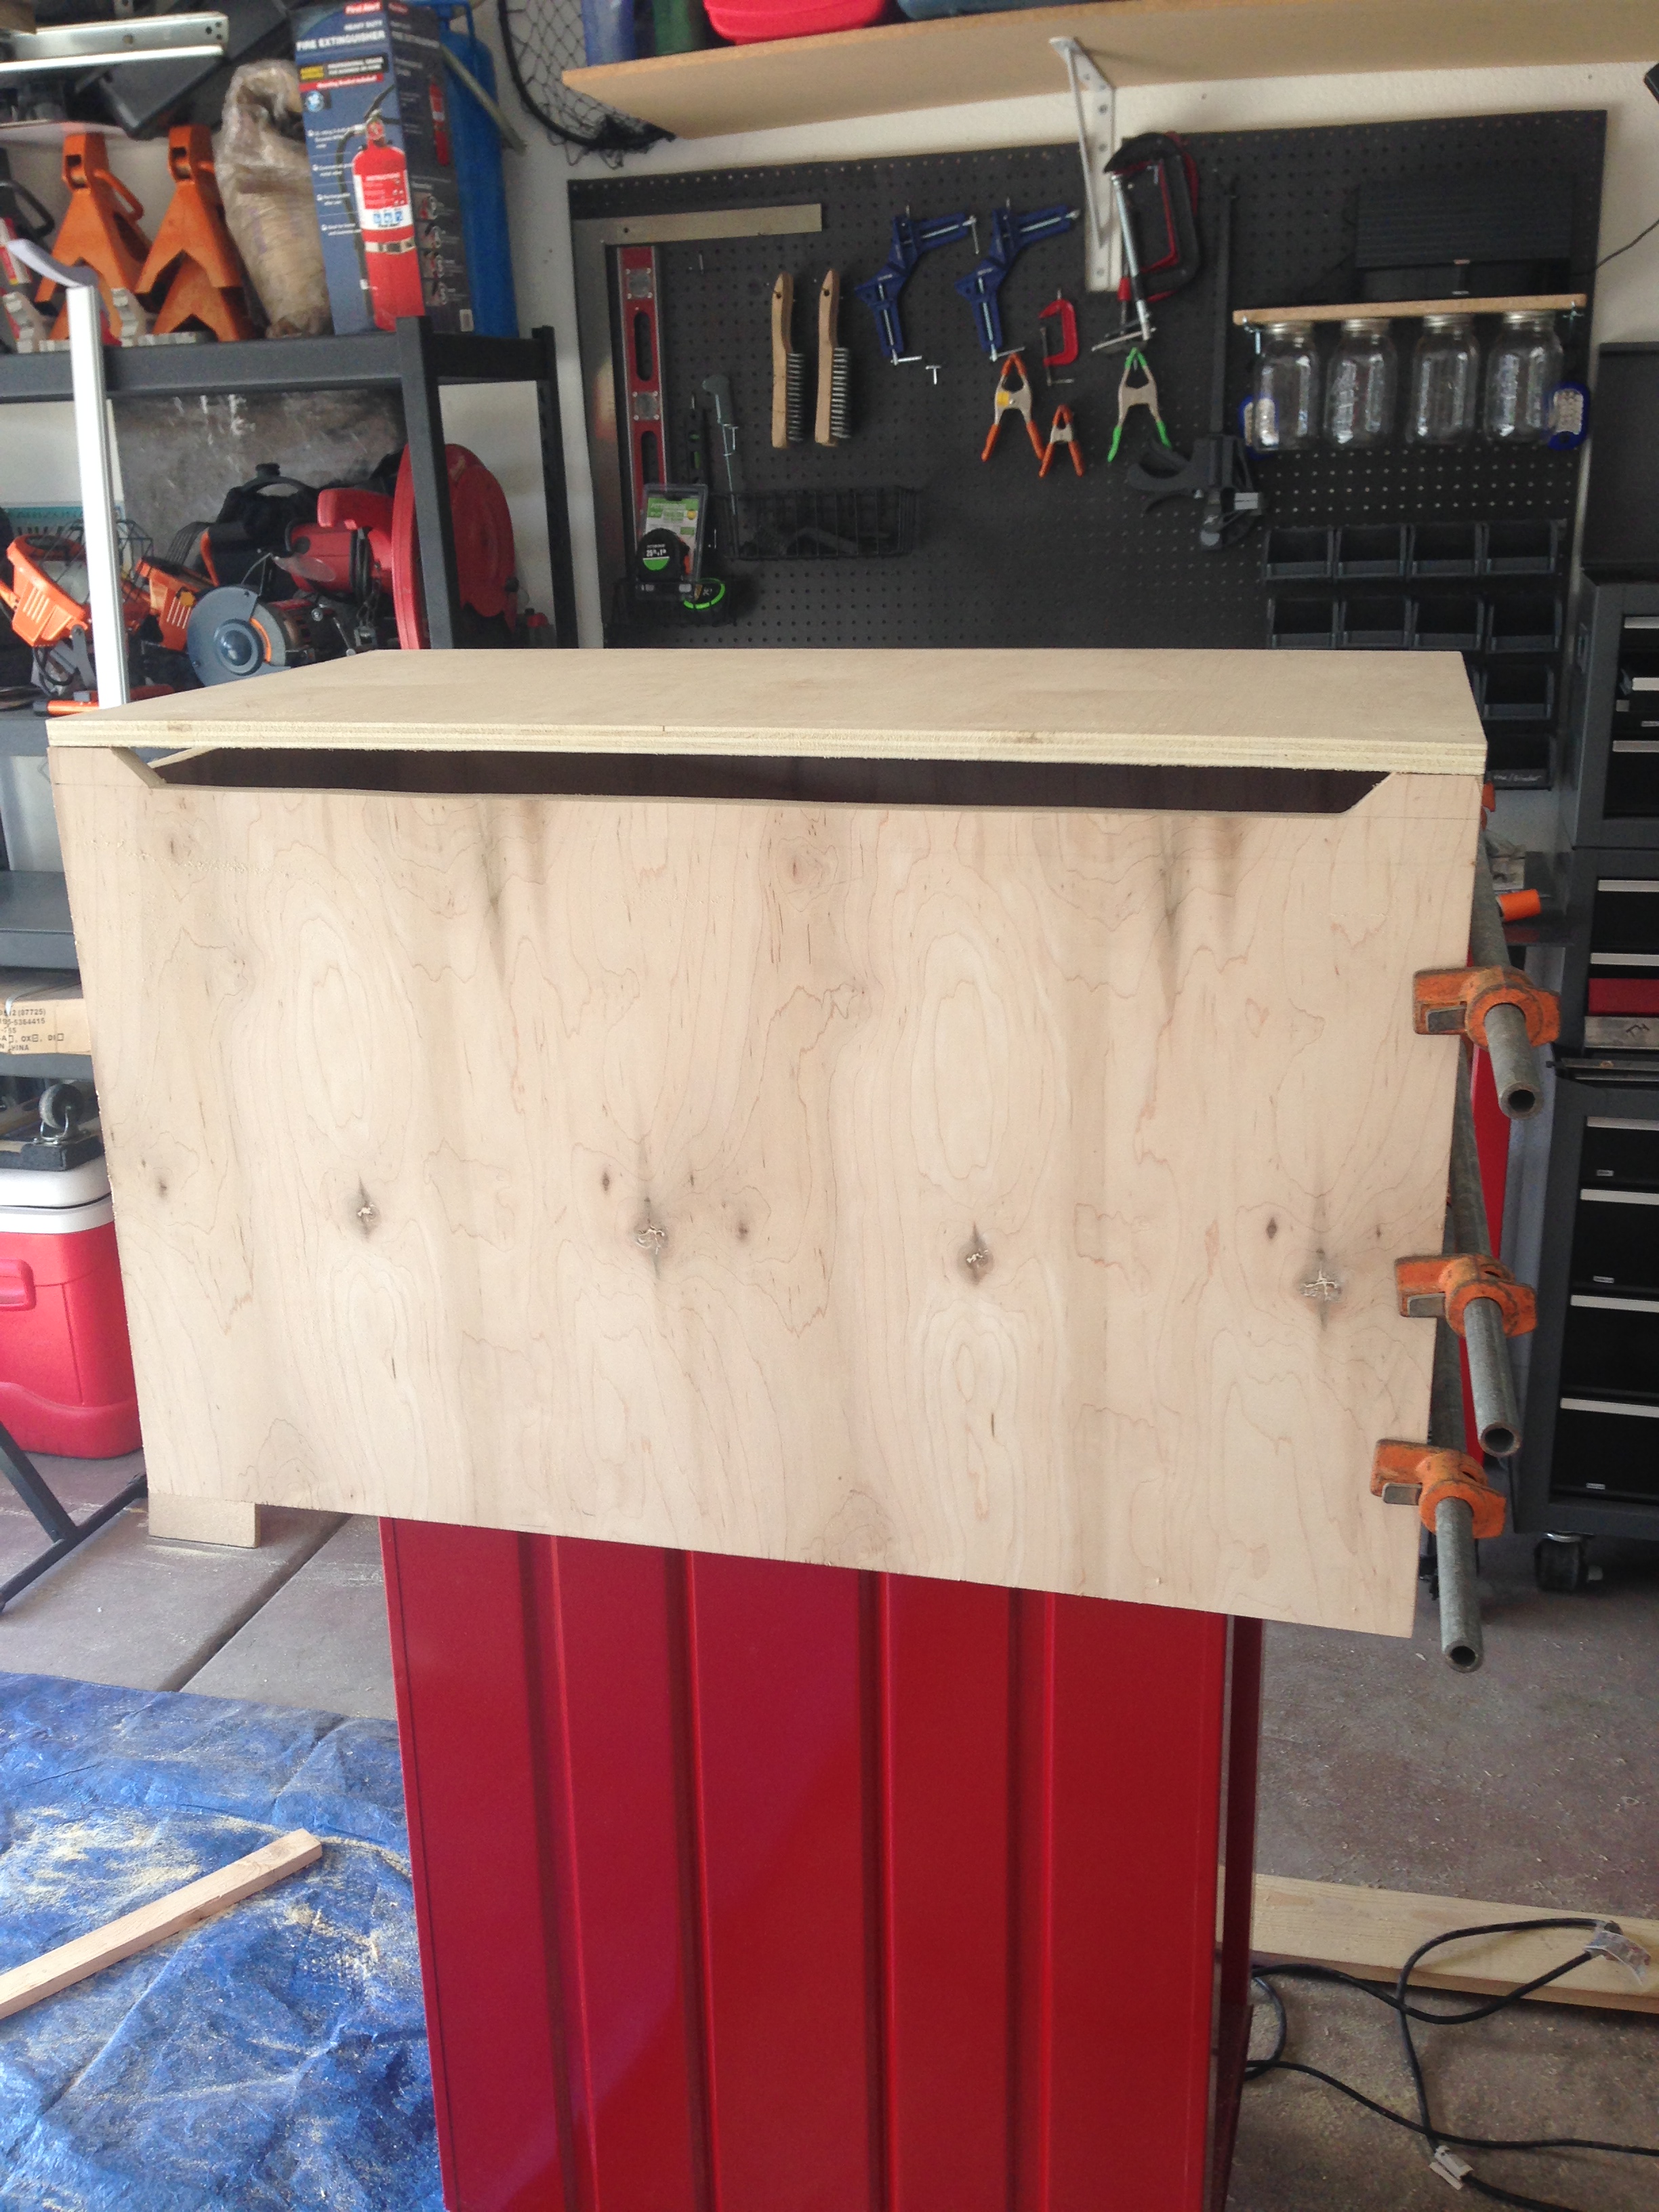
When securing the sides of the box together I used pocket hole screws to hide the hardware as a child proofing step and to get the clean look of the Lego brick I was striving for. For the bottom I used a plank design and more pocket hole screws.

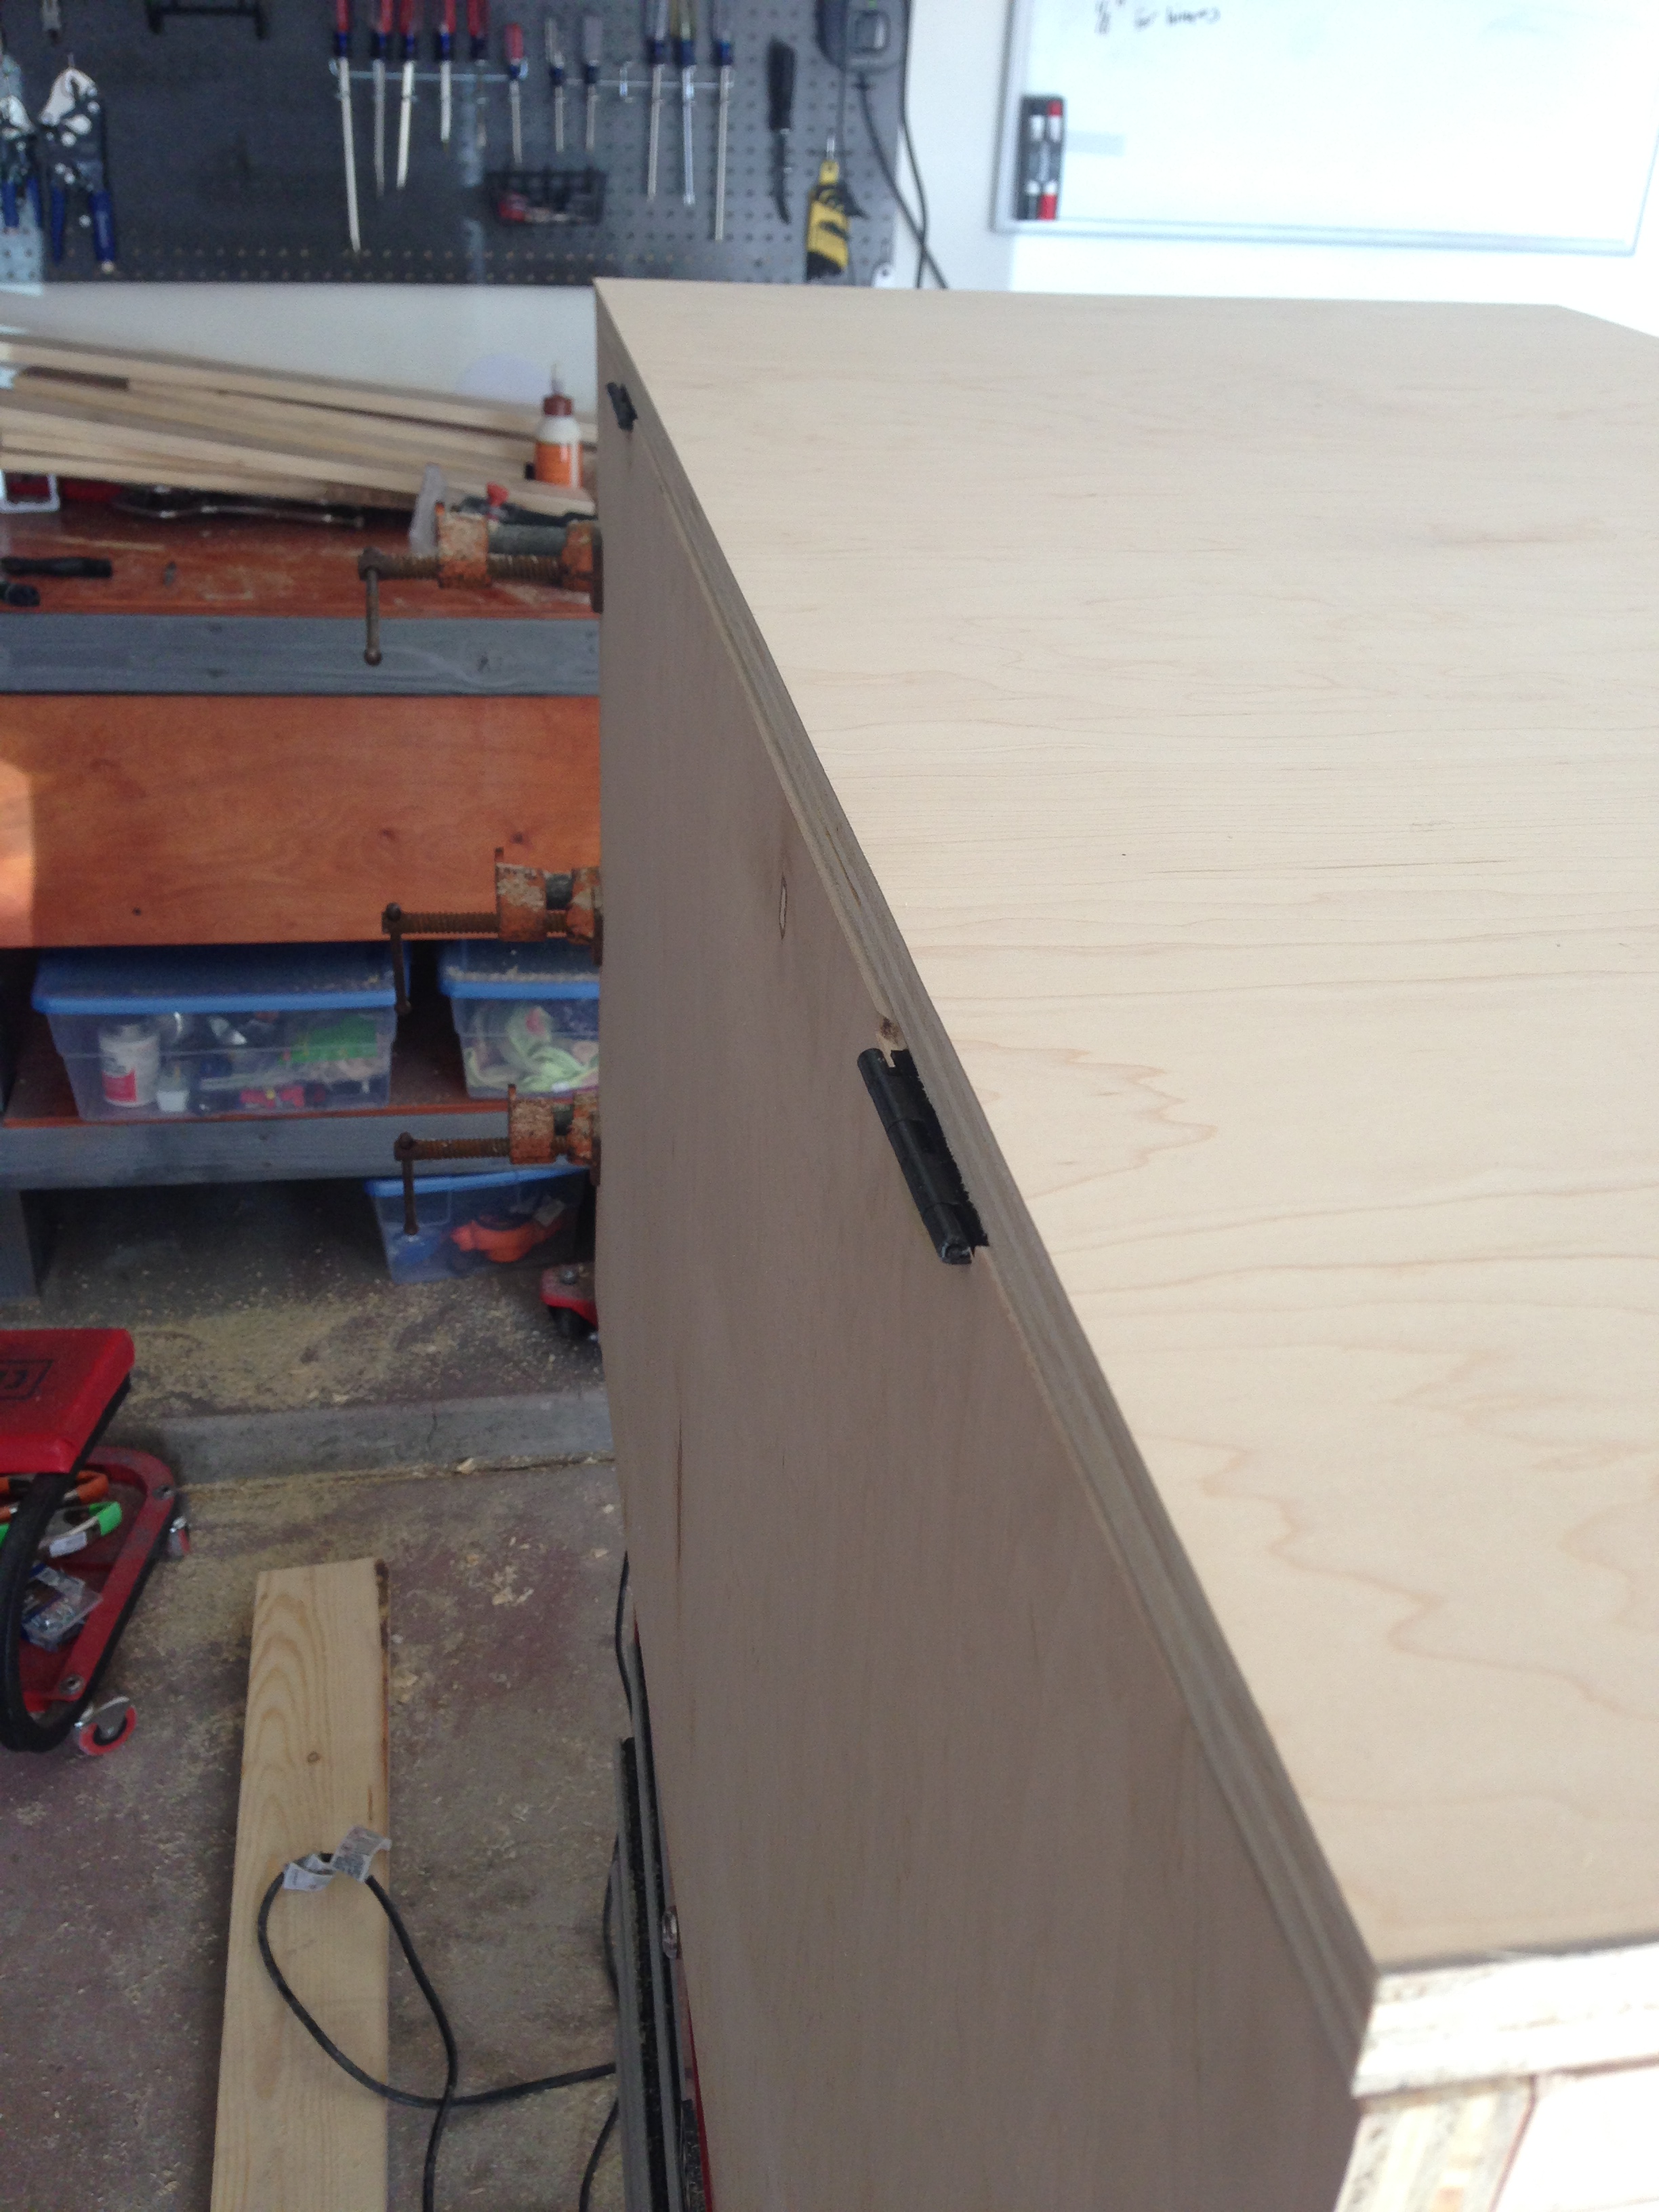
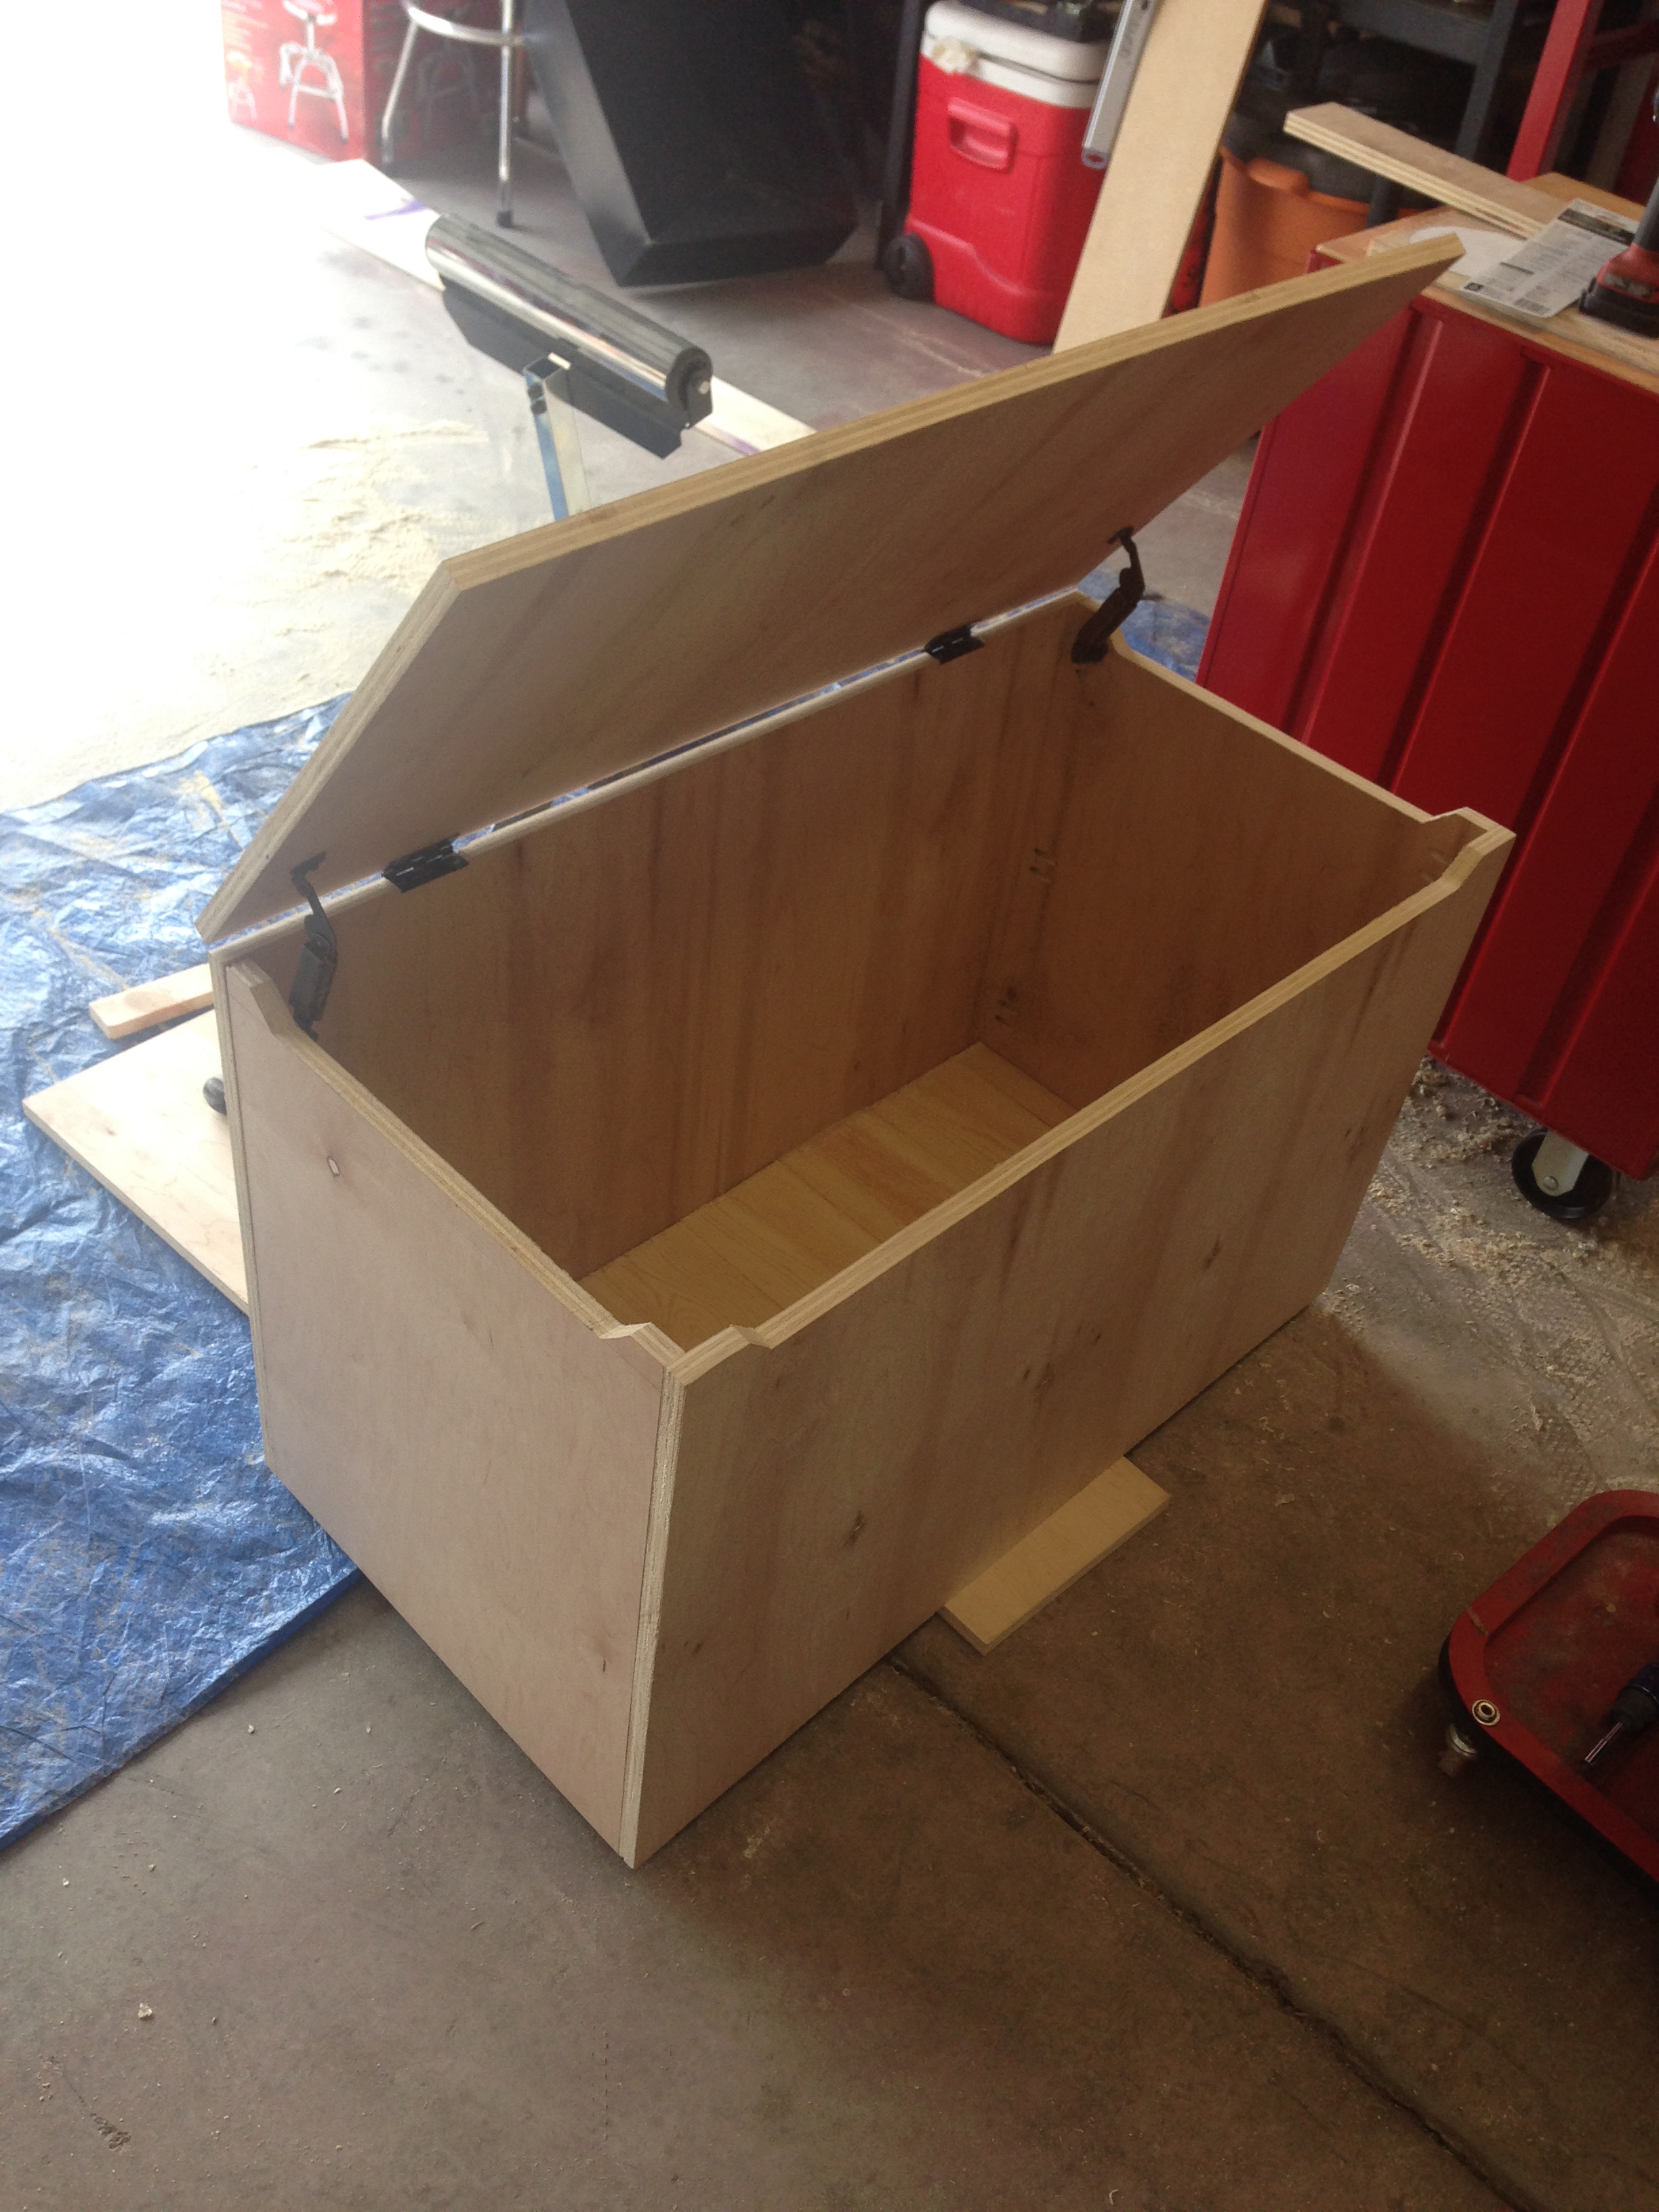
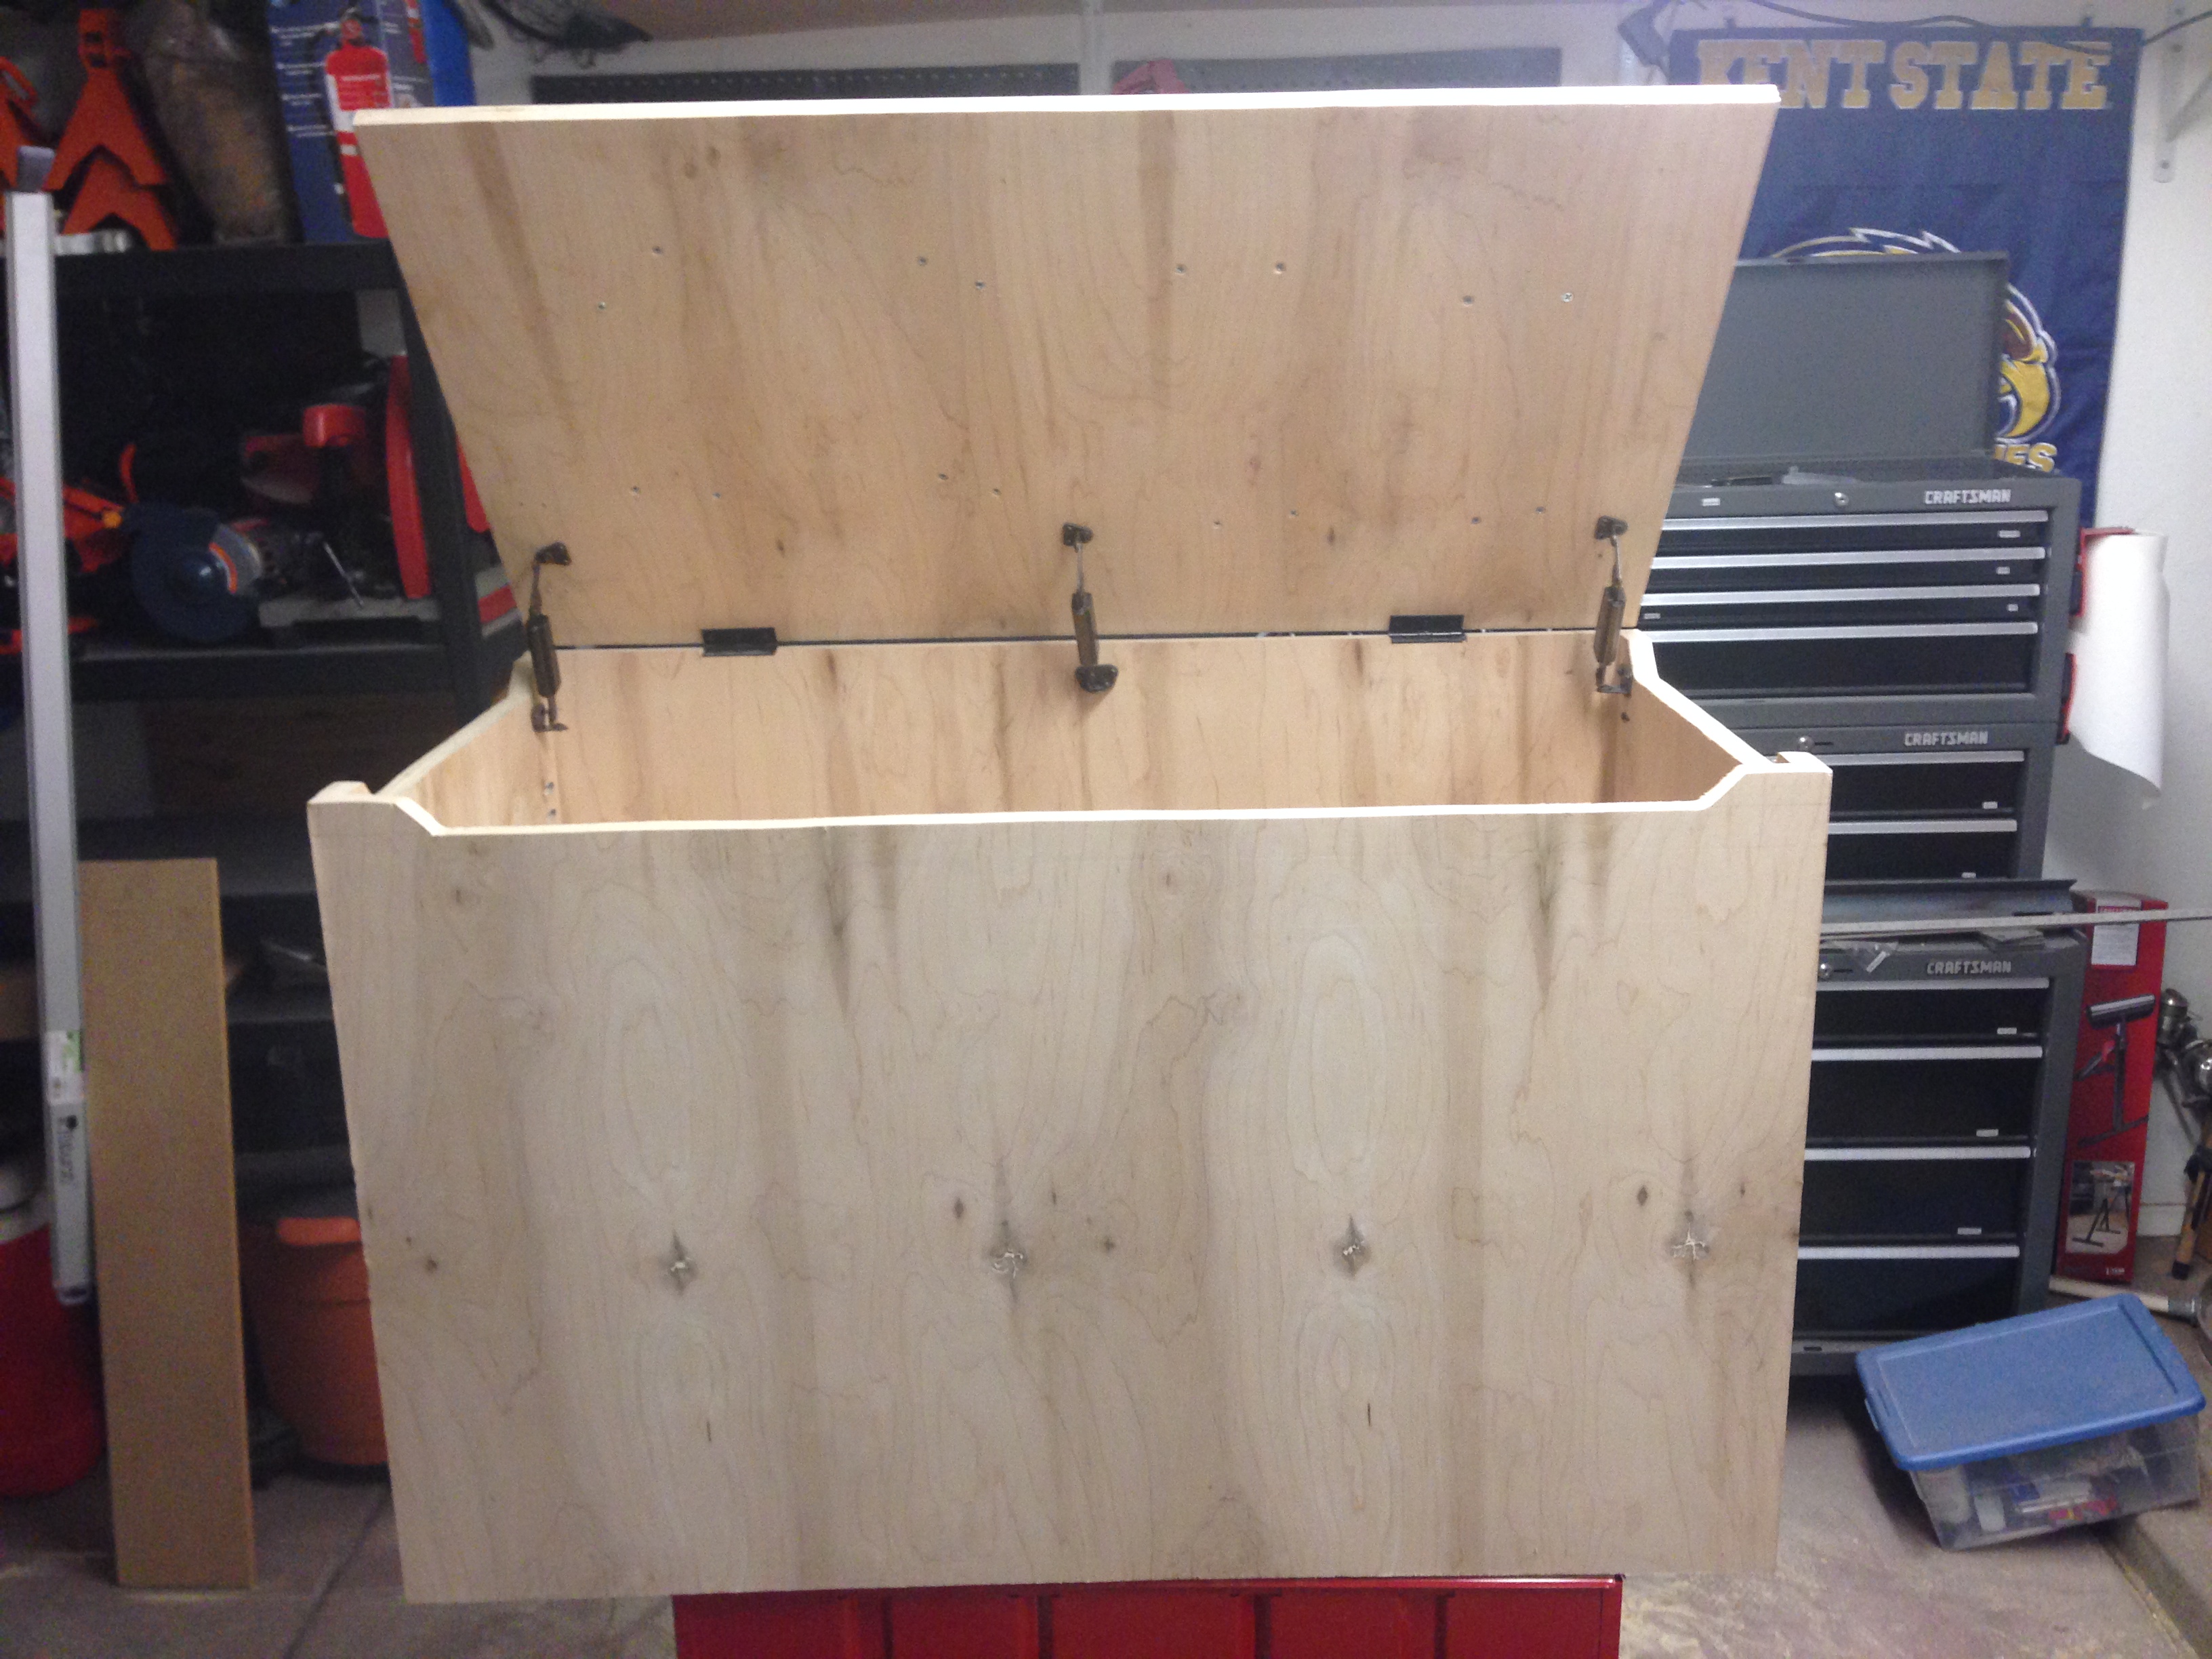
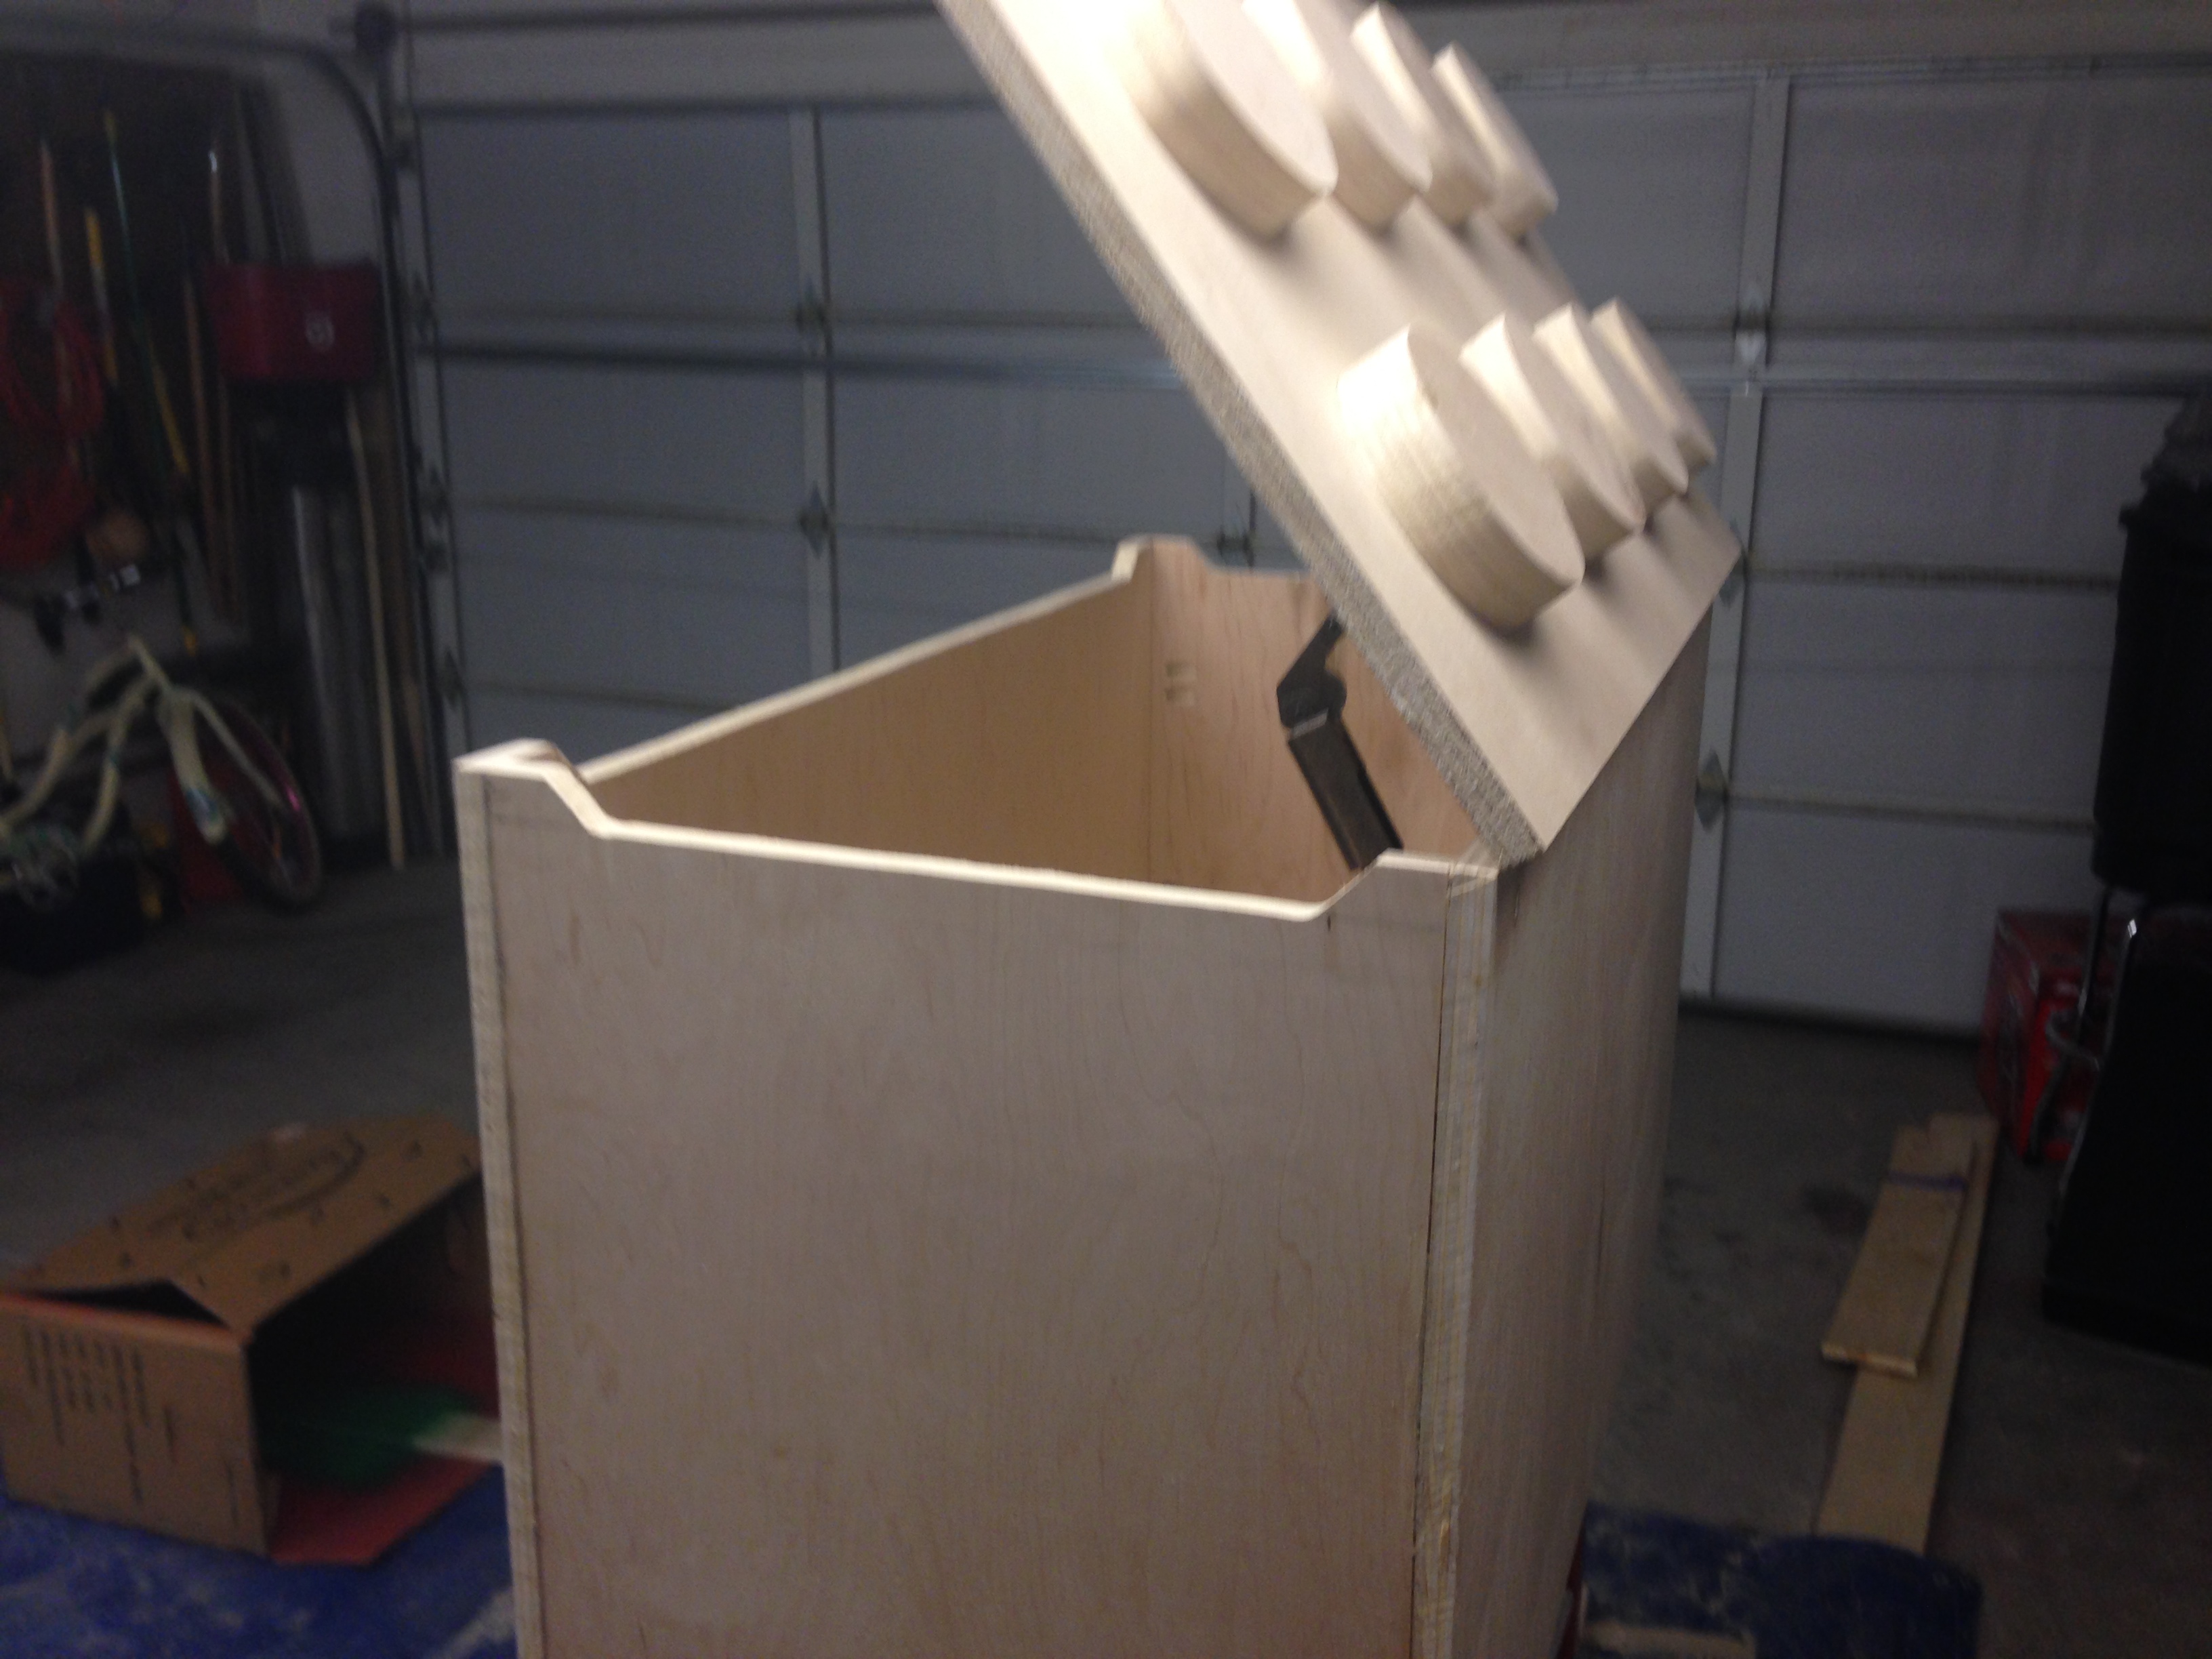
Now for the lid. The top of the box was secured with two hinges that are chiseled in to make the top fit flush.
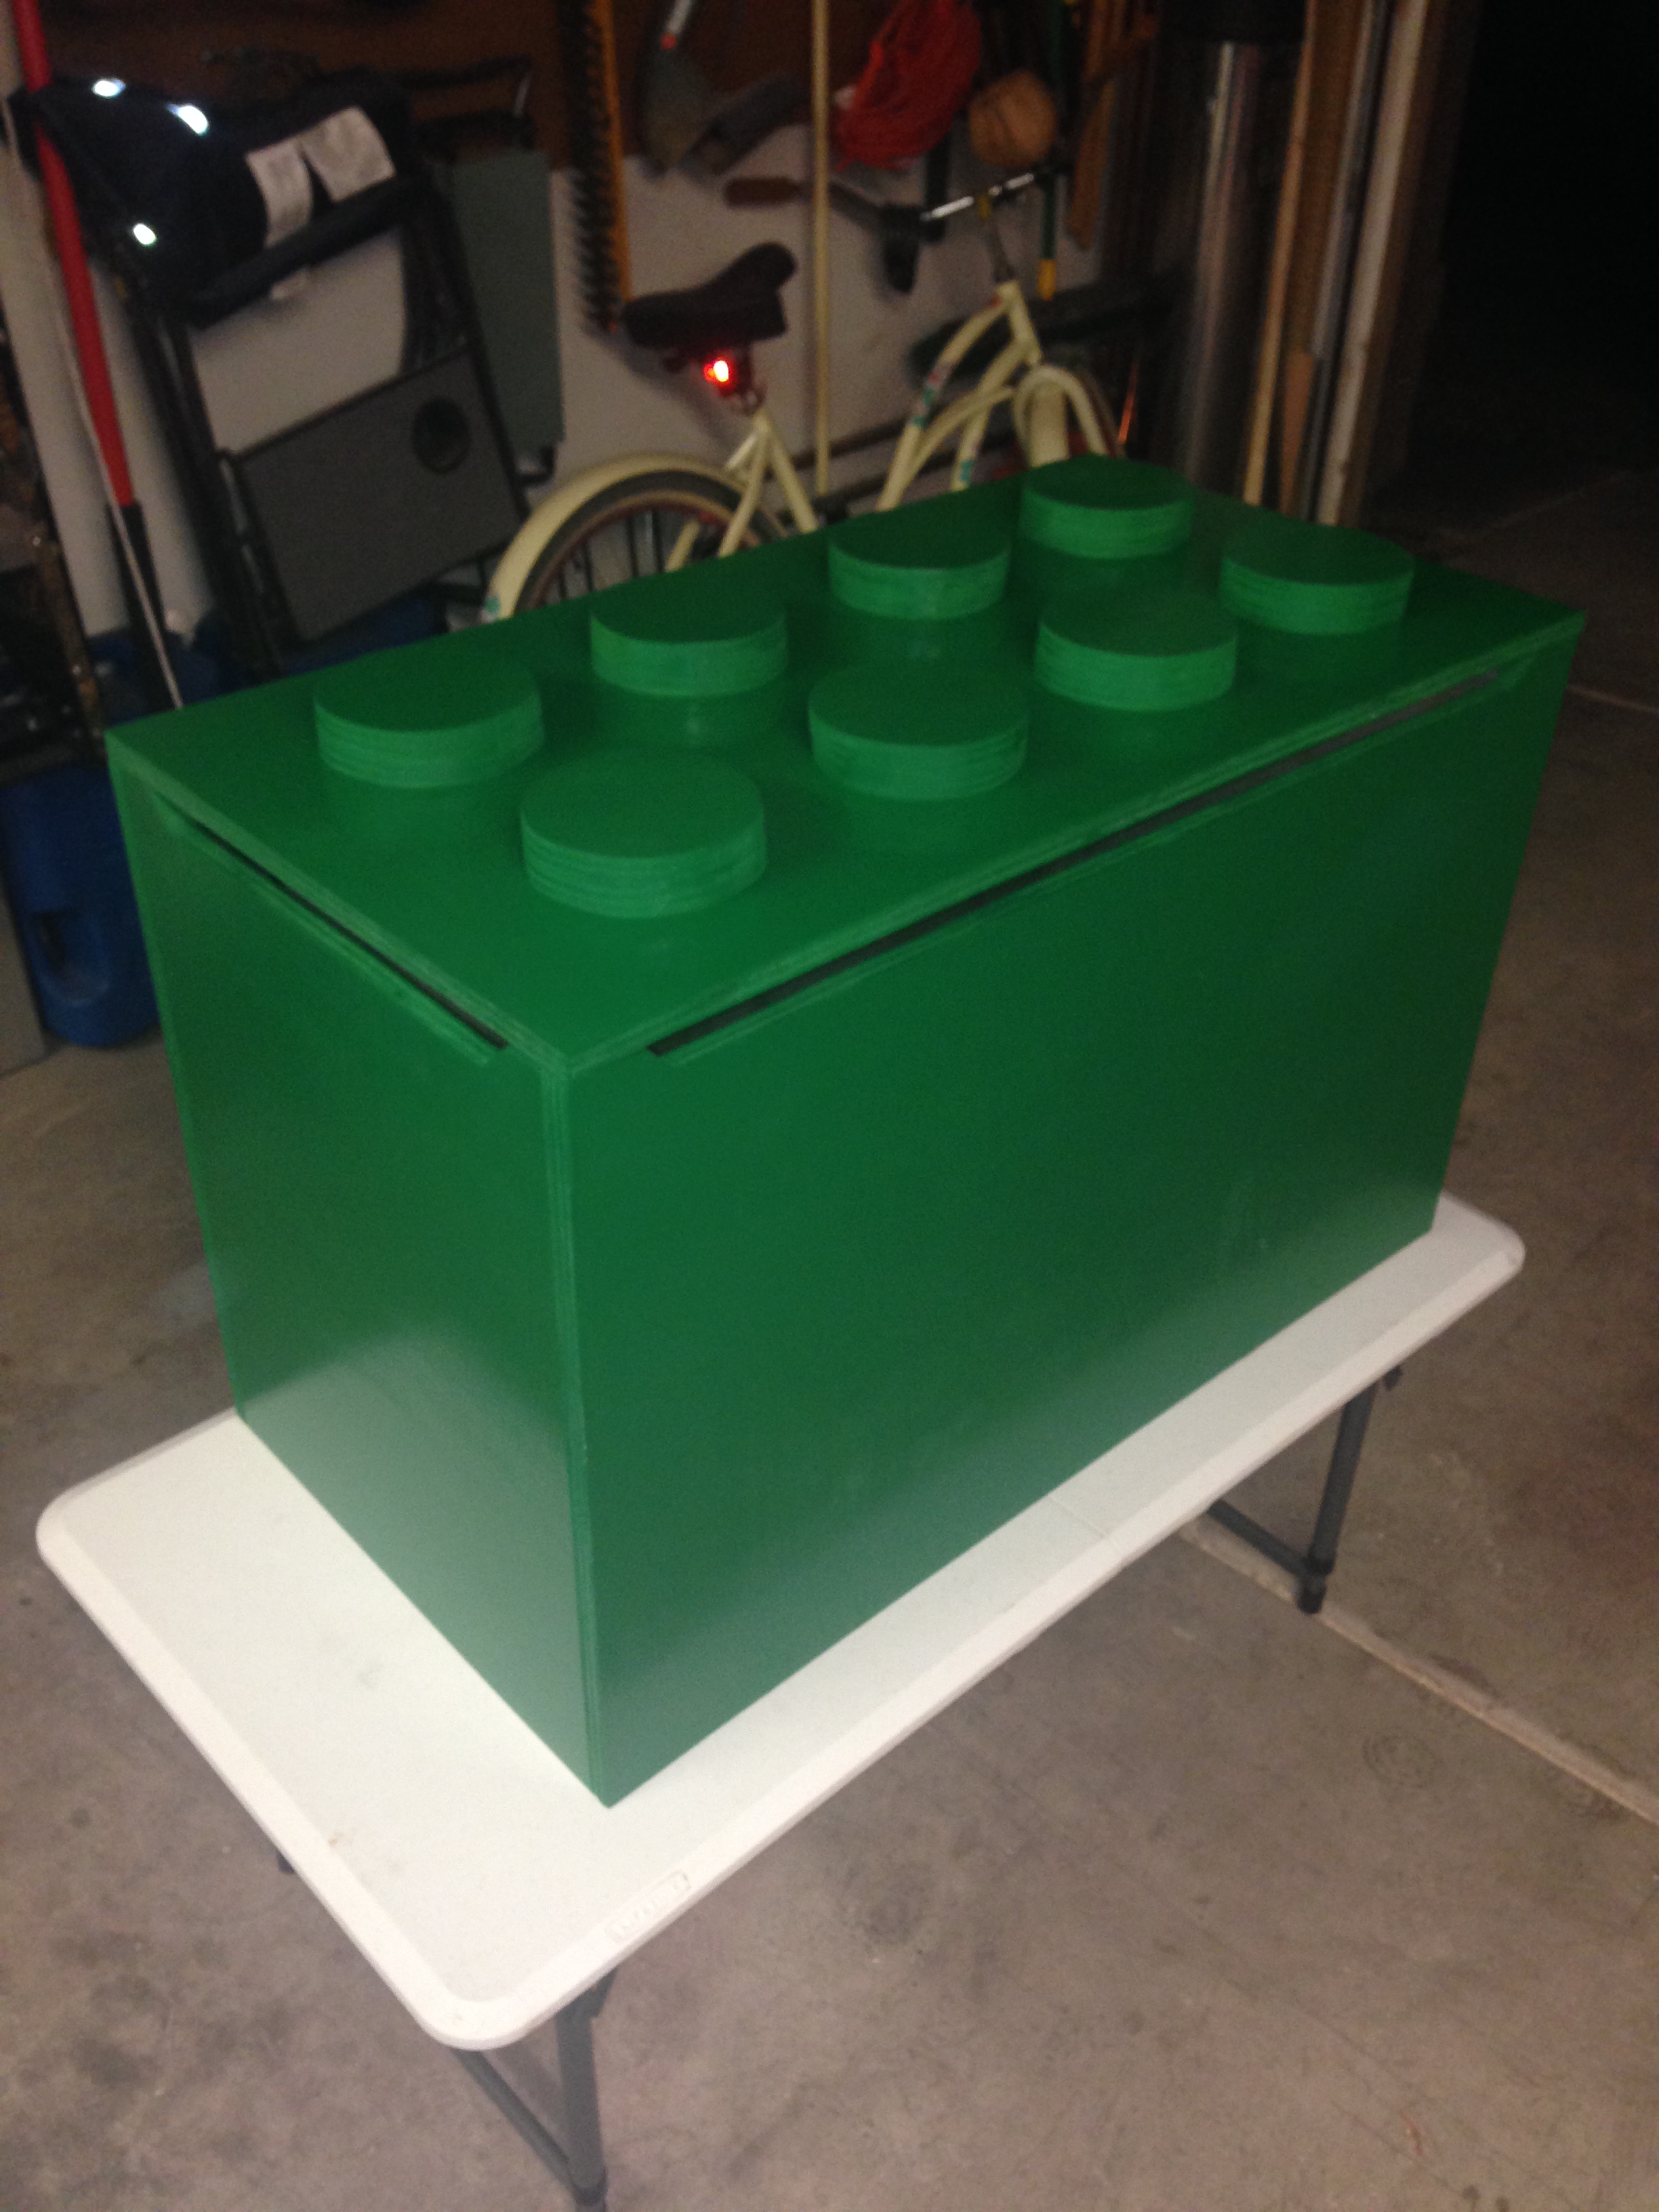
With my mind still set on making this toy box safe for my nephew, I knew that I had to prevent the top from slamming shut. I already ordered some toy box lid supports to prevent this but also wanted to lower the amount of space that could crush a kids fingers. So, as a safety feature I cut a slit at the top of each side and the front. As you can see below this eliminates most of the fear that if the three lid supports all fail…at the same time…and decided to smash anything below it’s weight there are only 3 inches of surface area that contact with the lid at each corner.
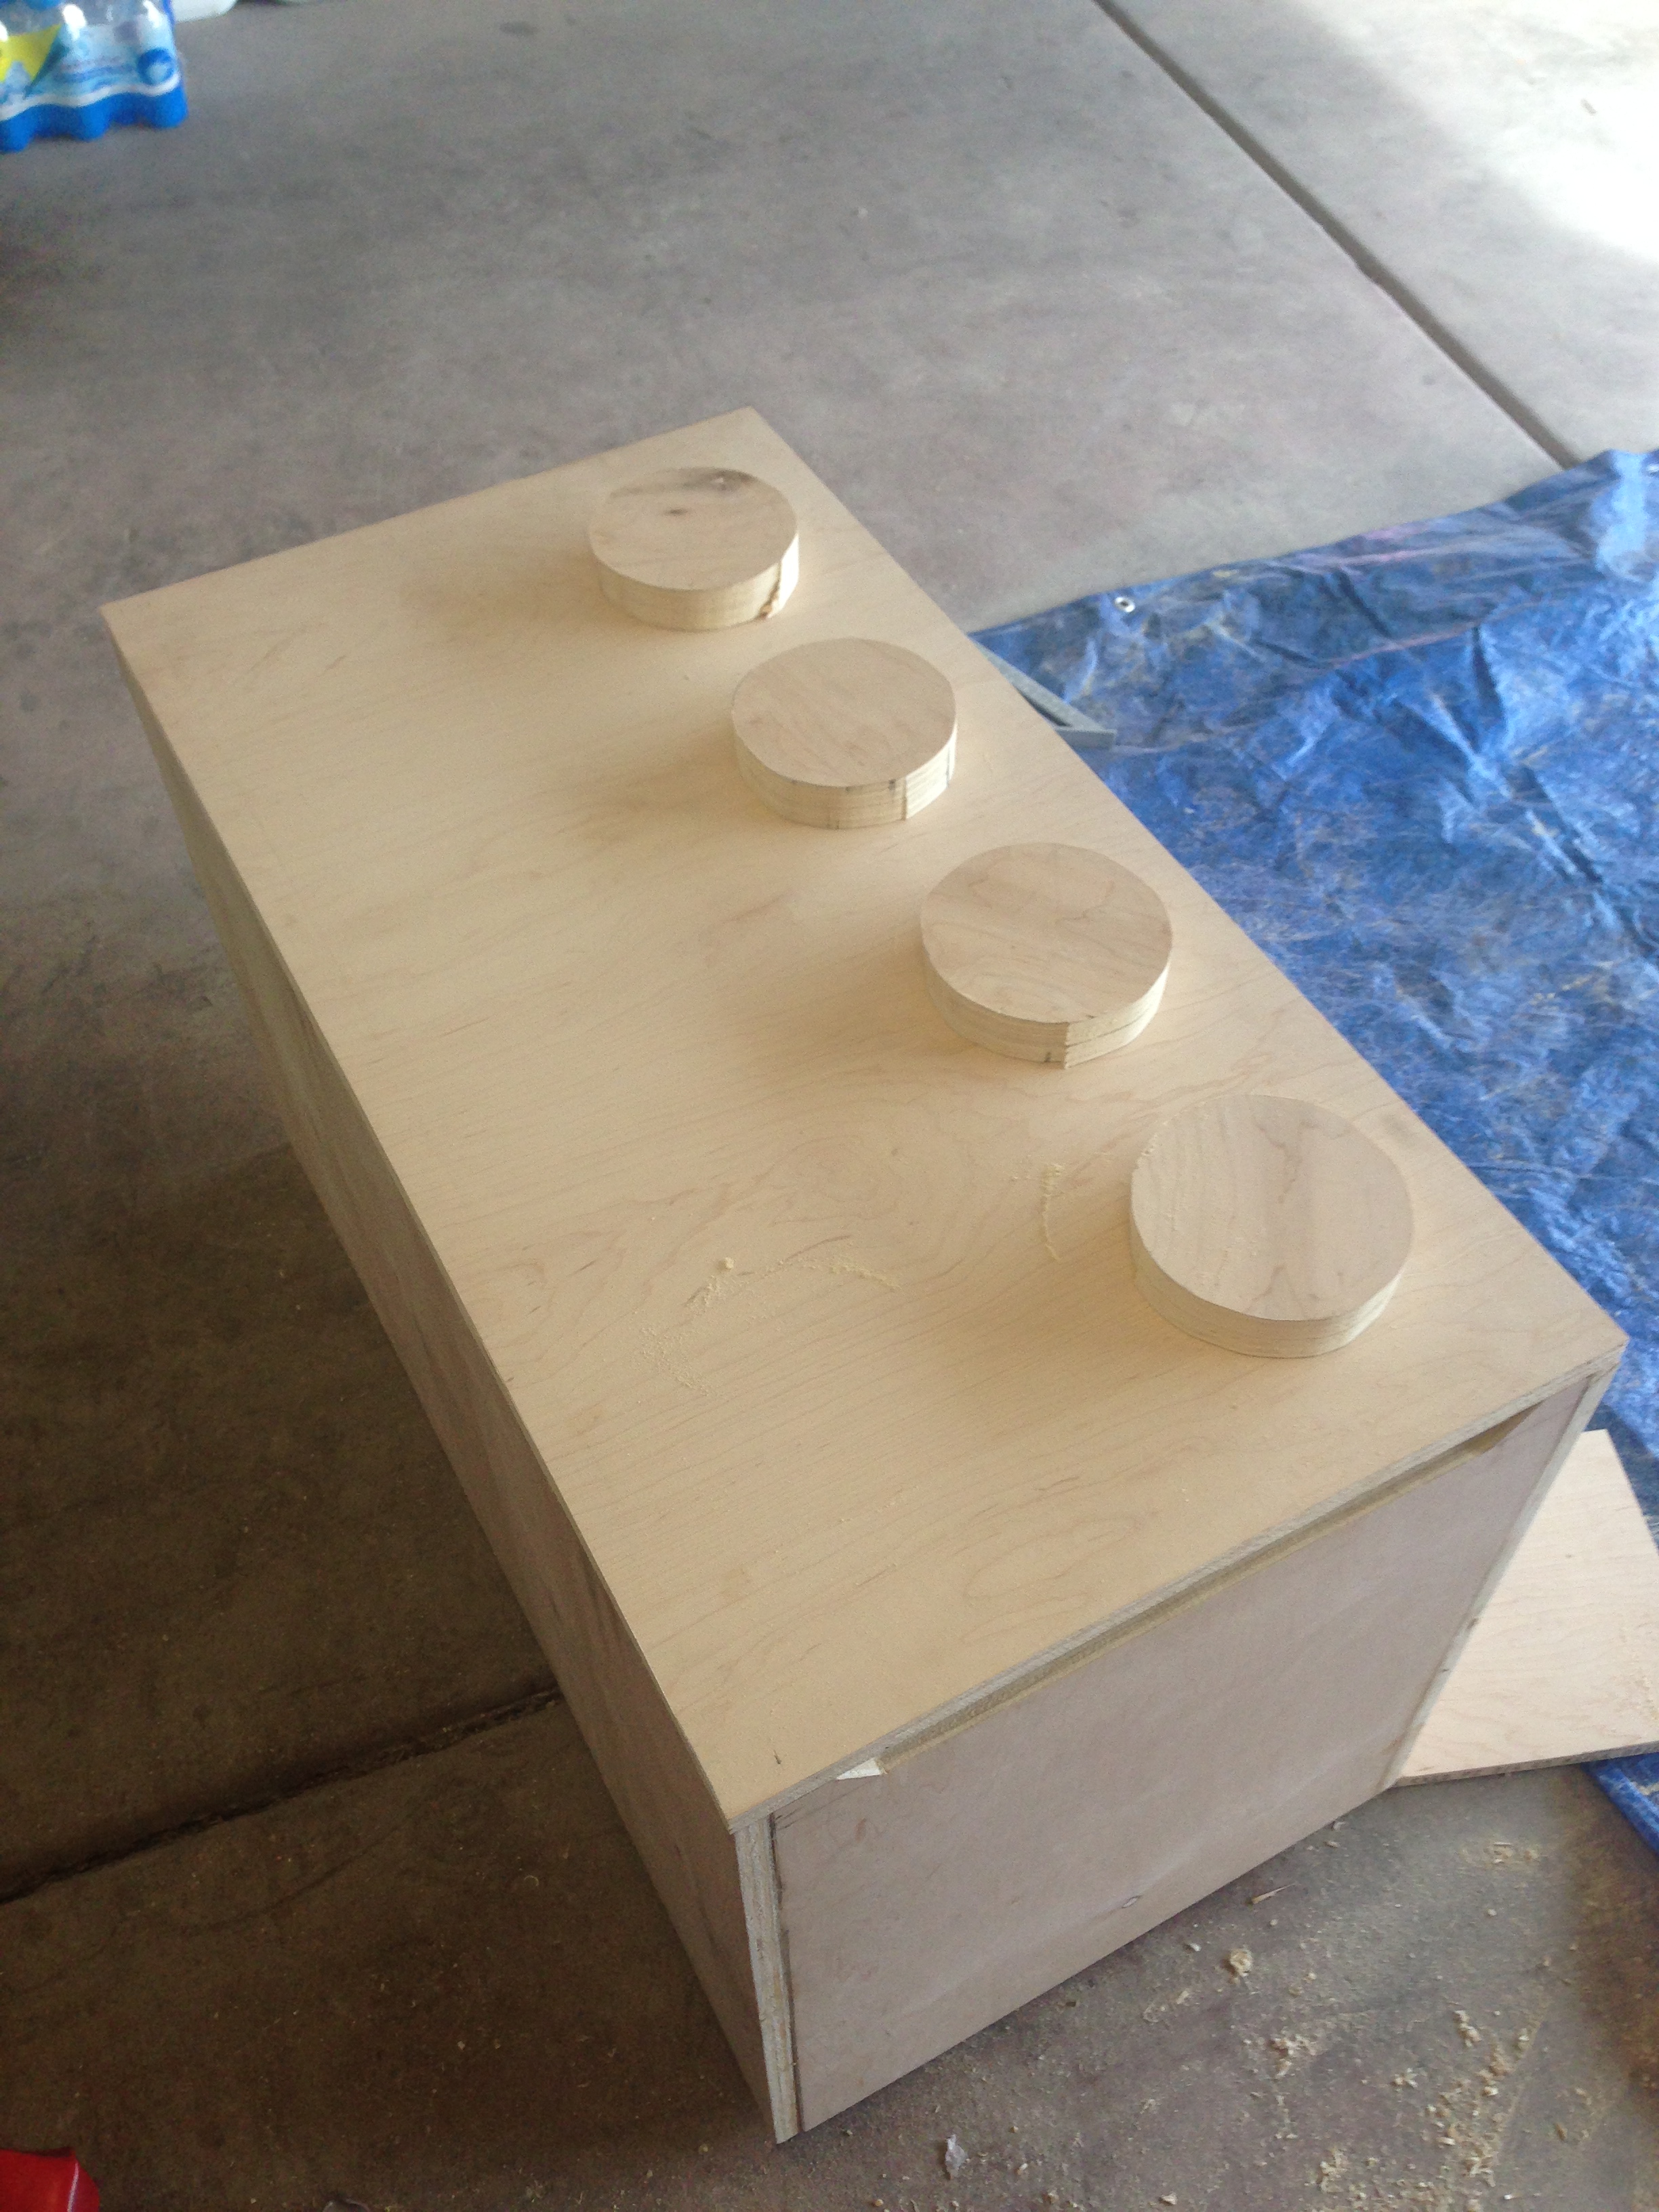
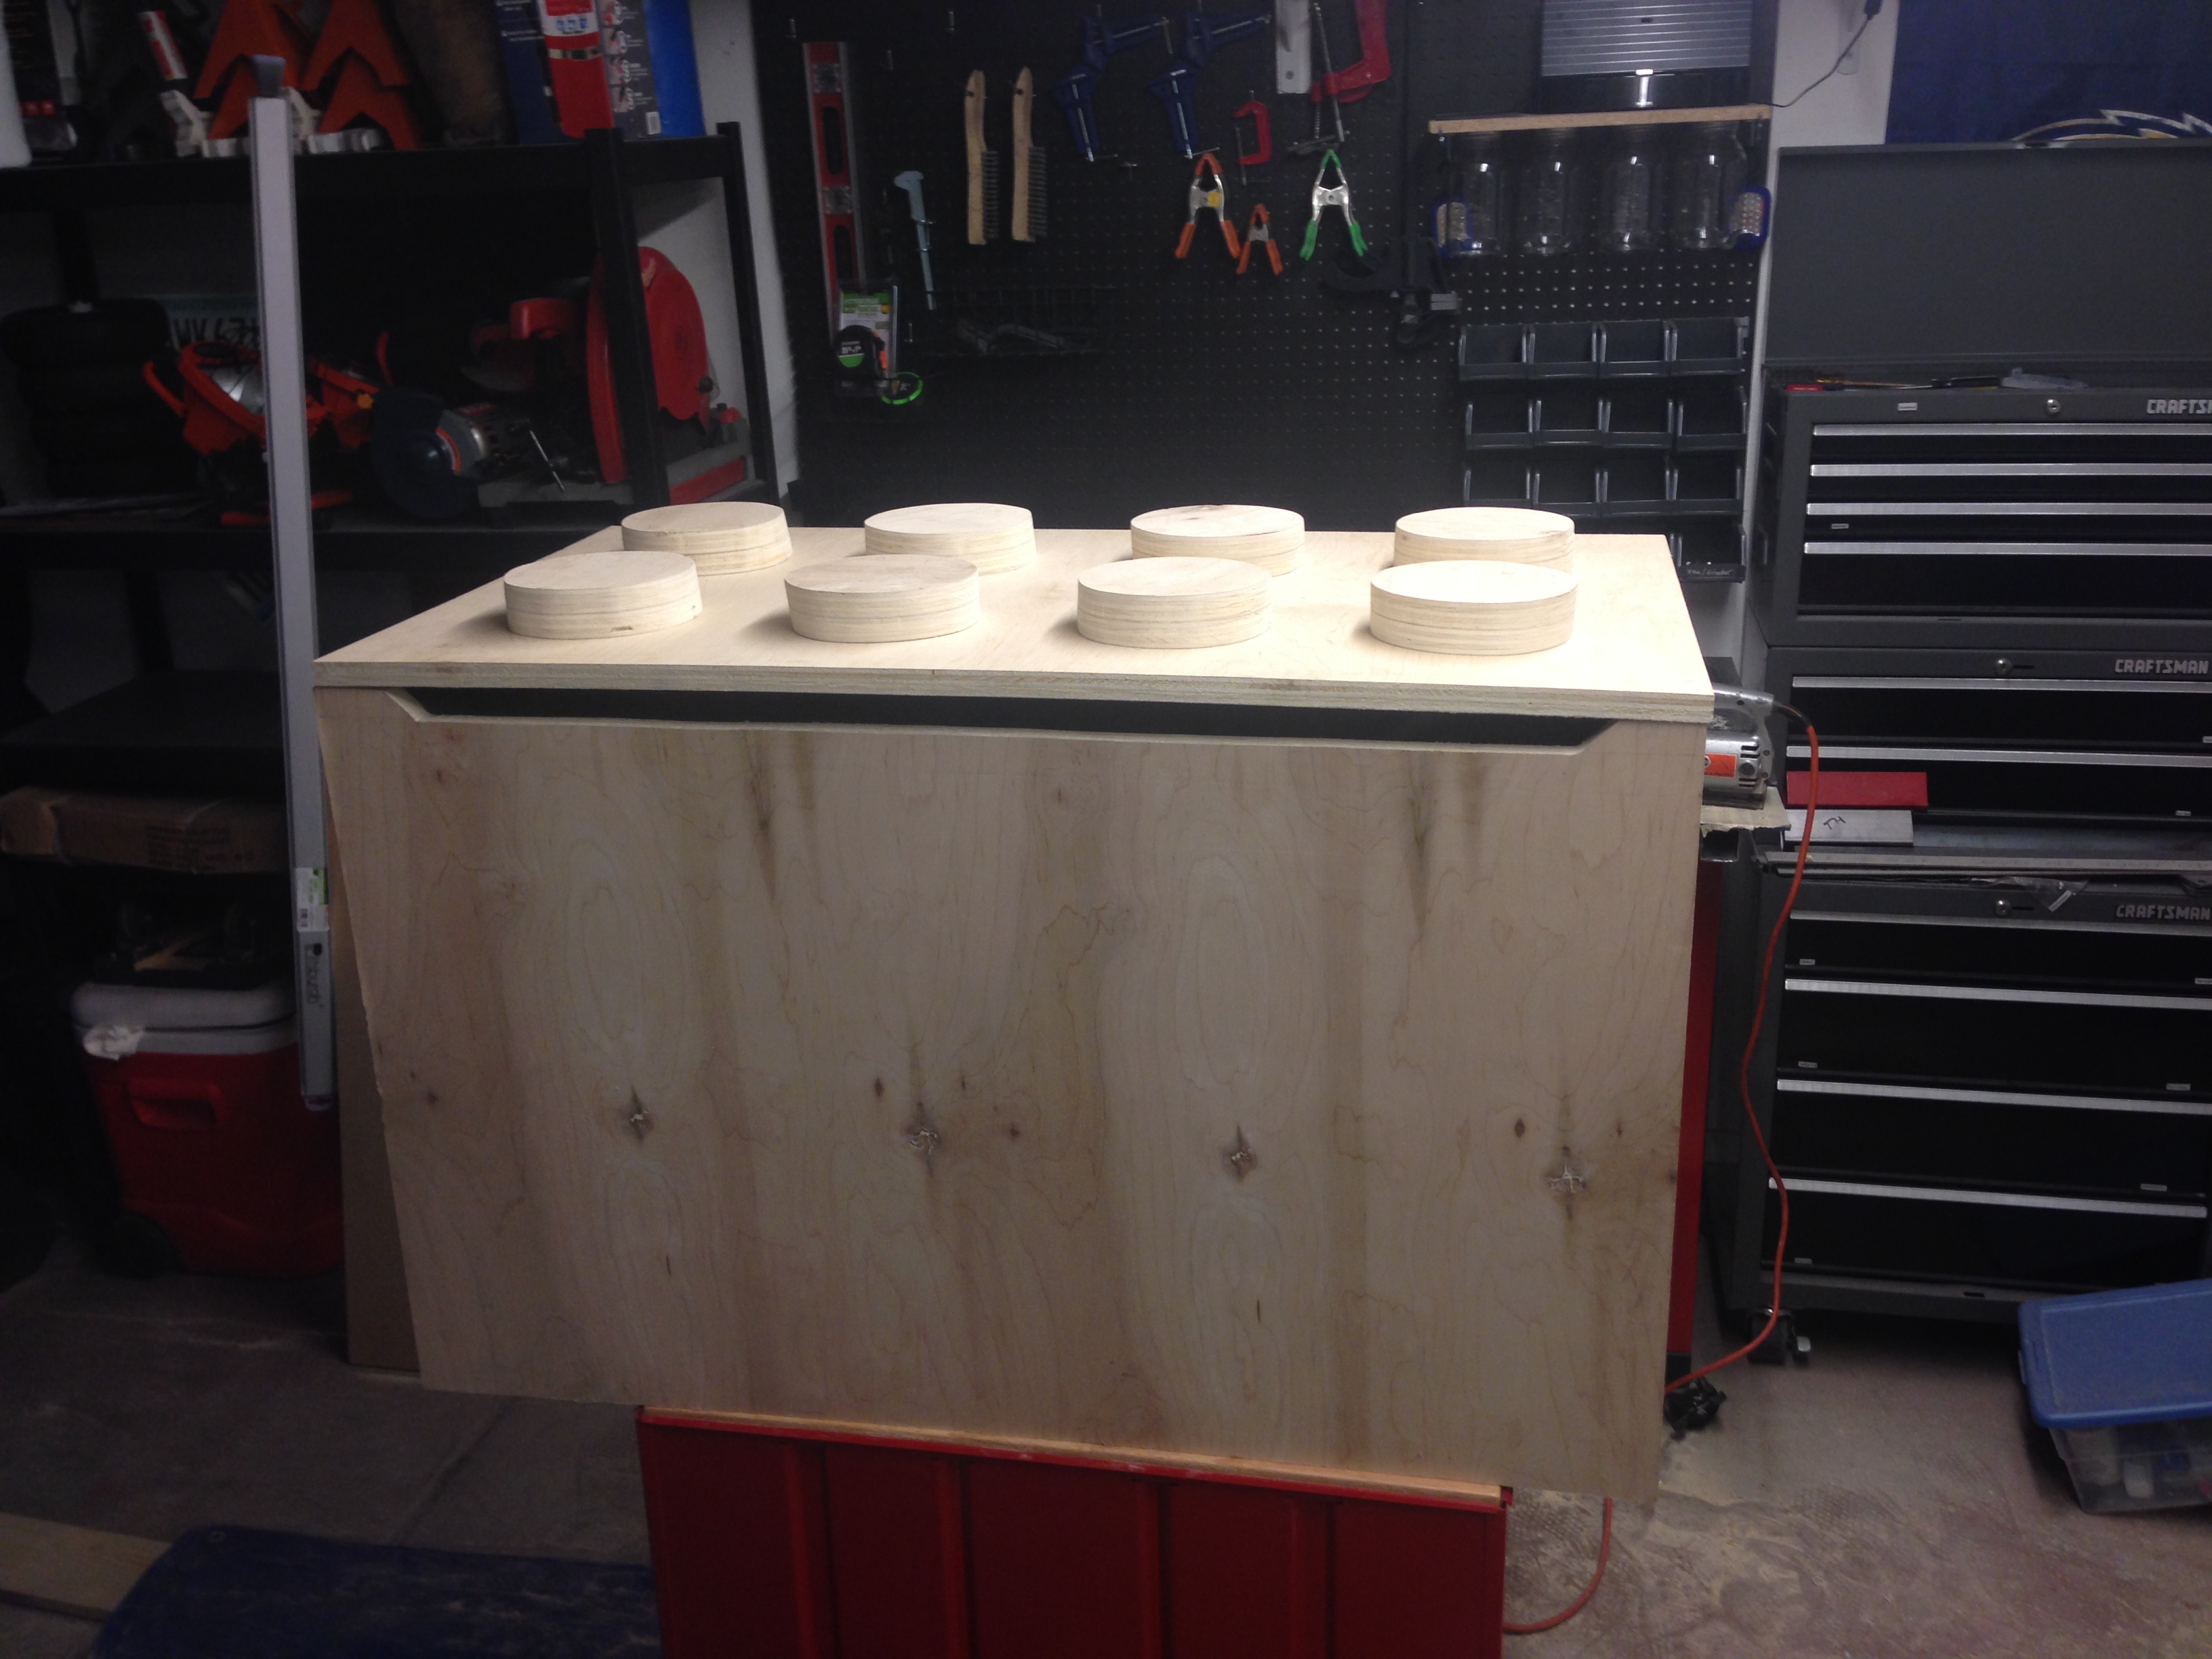
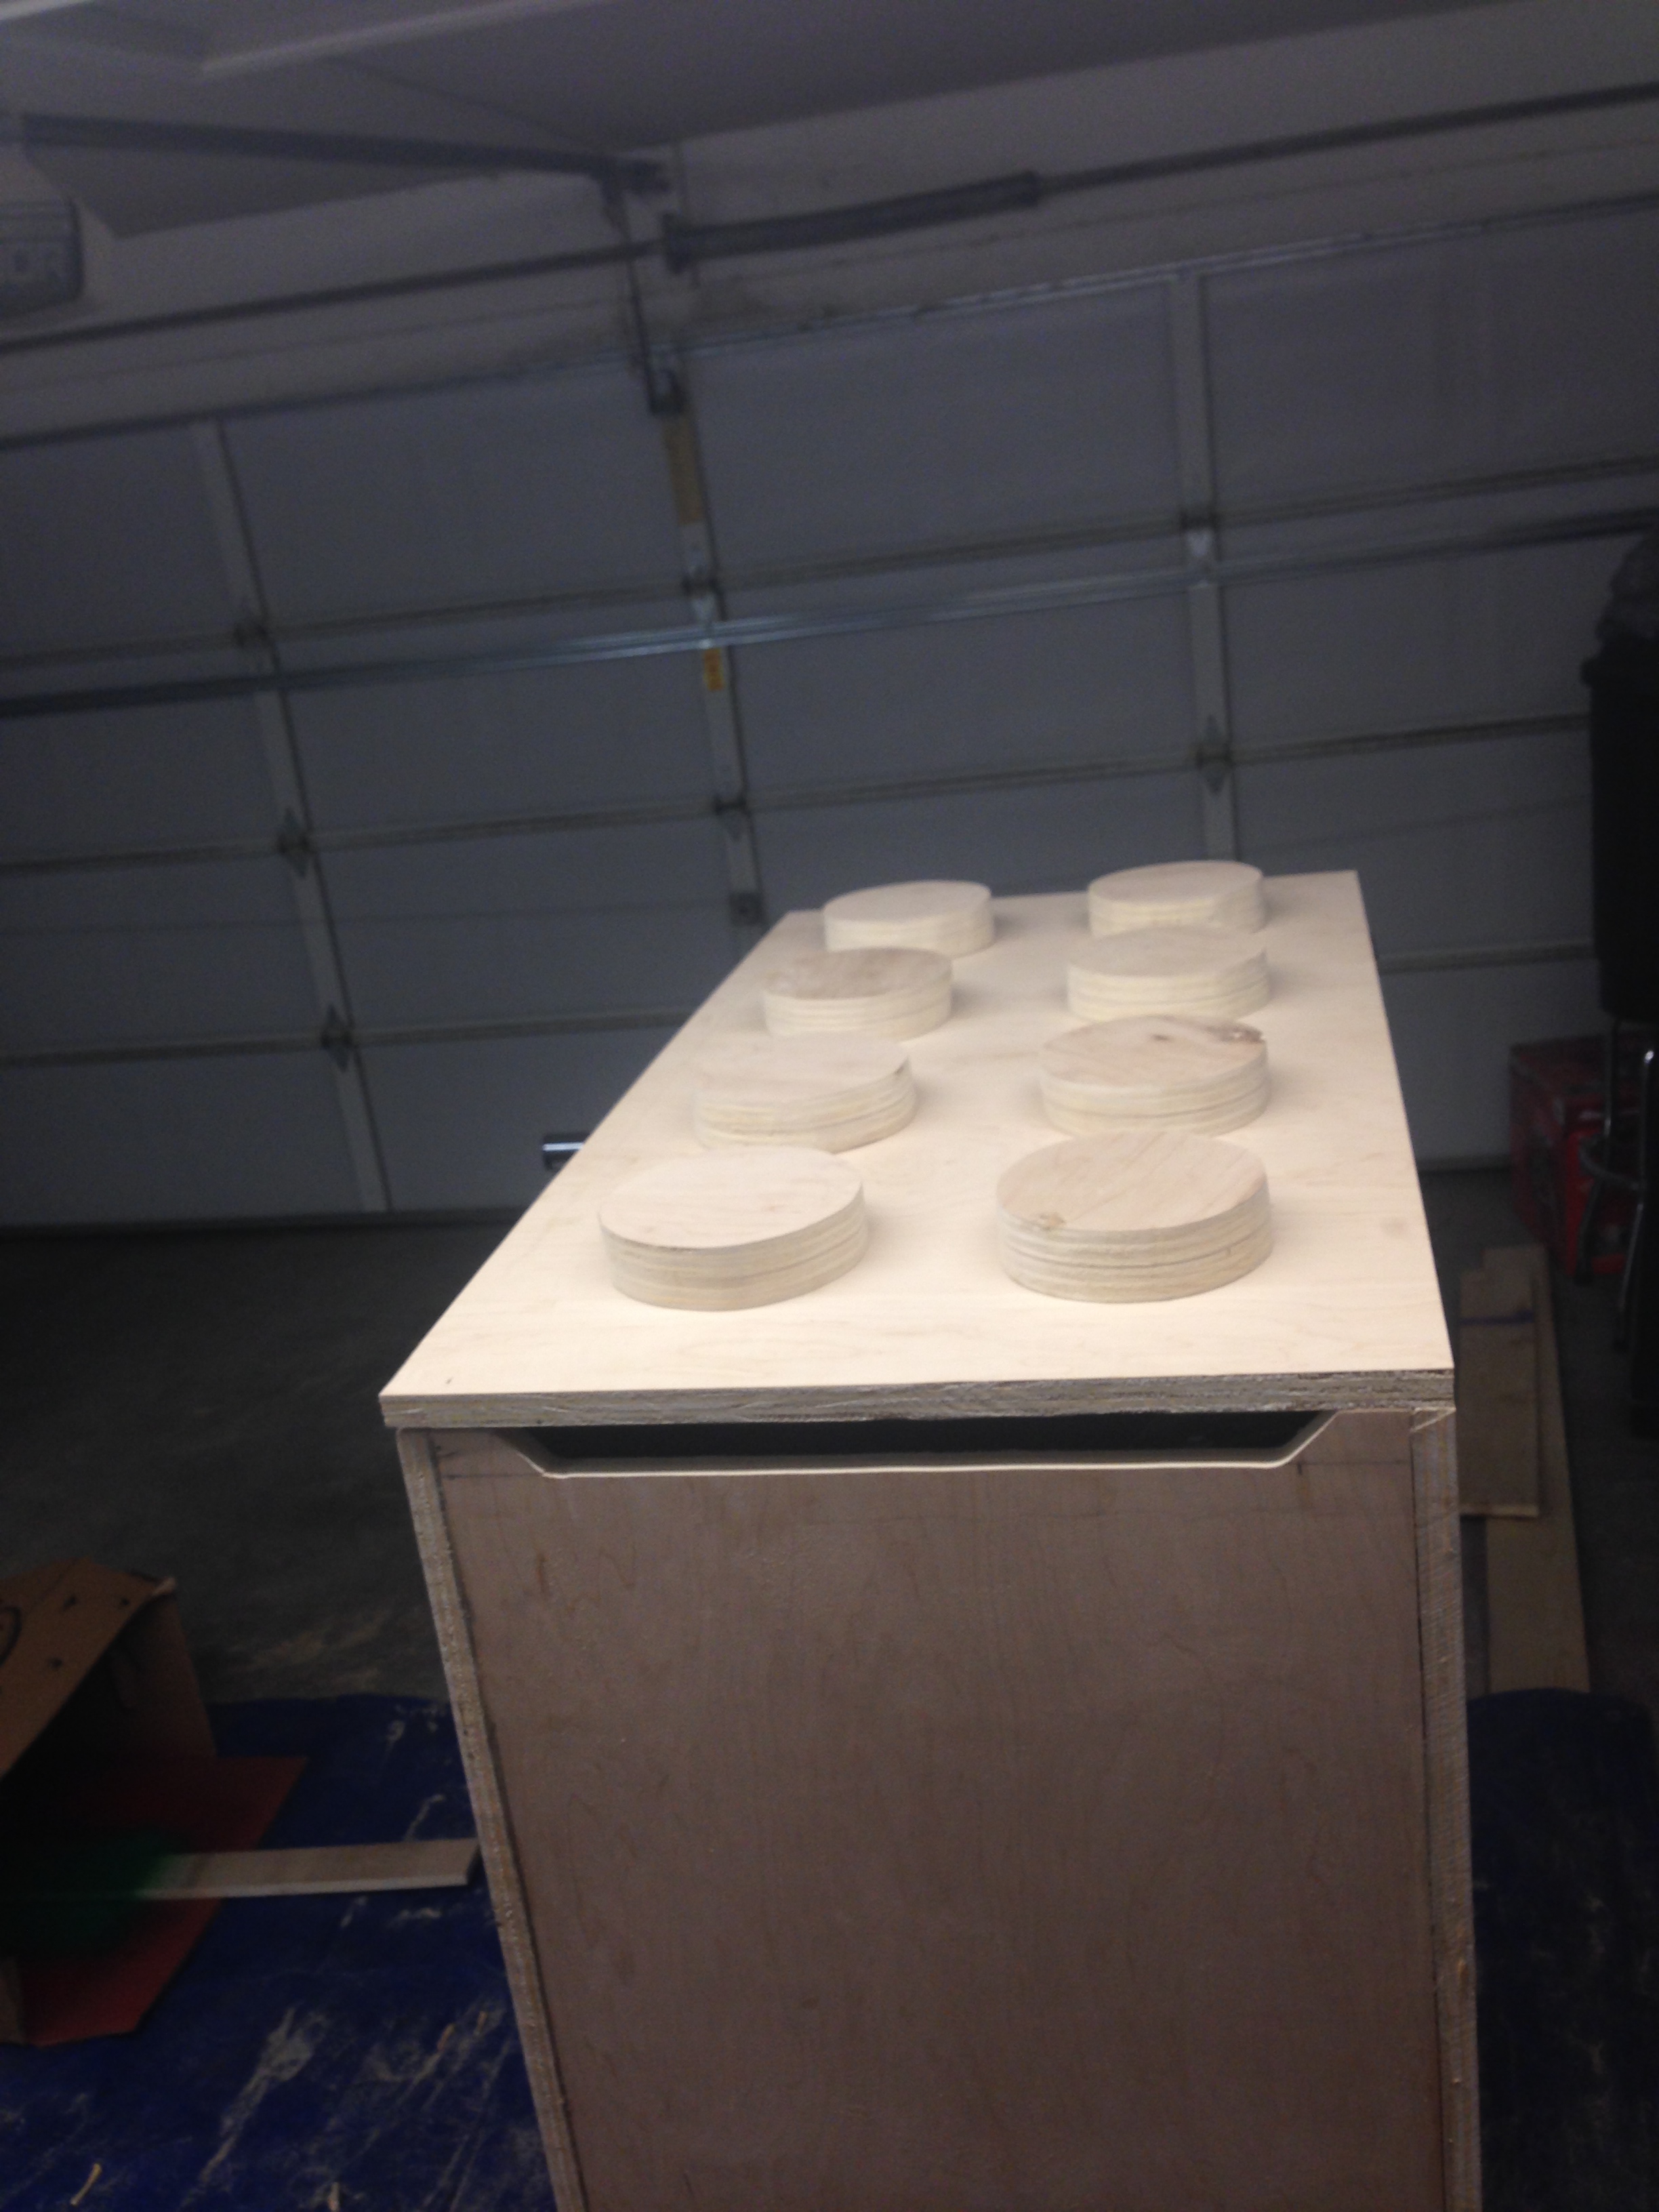
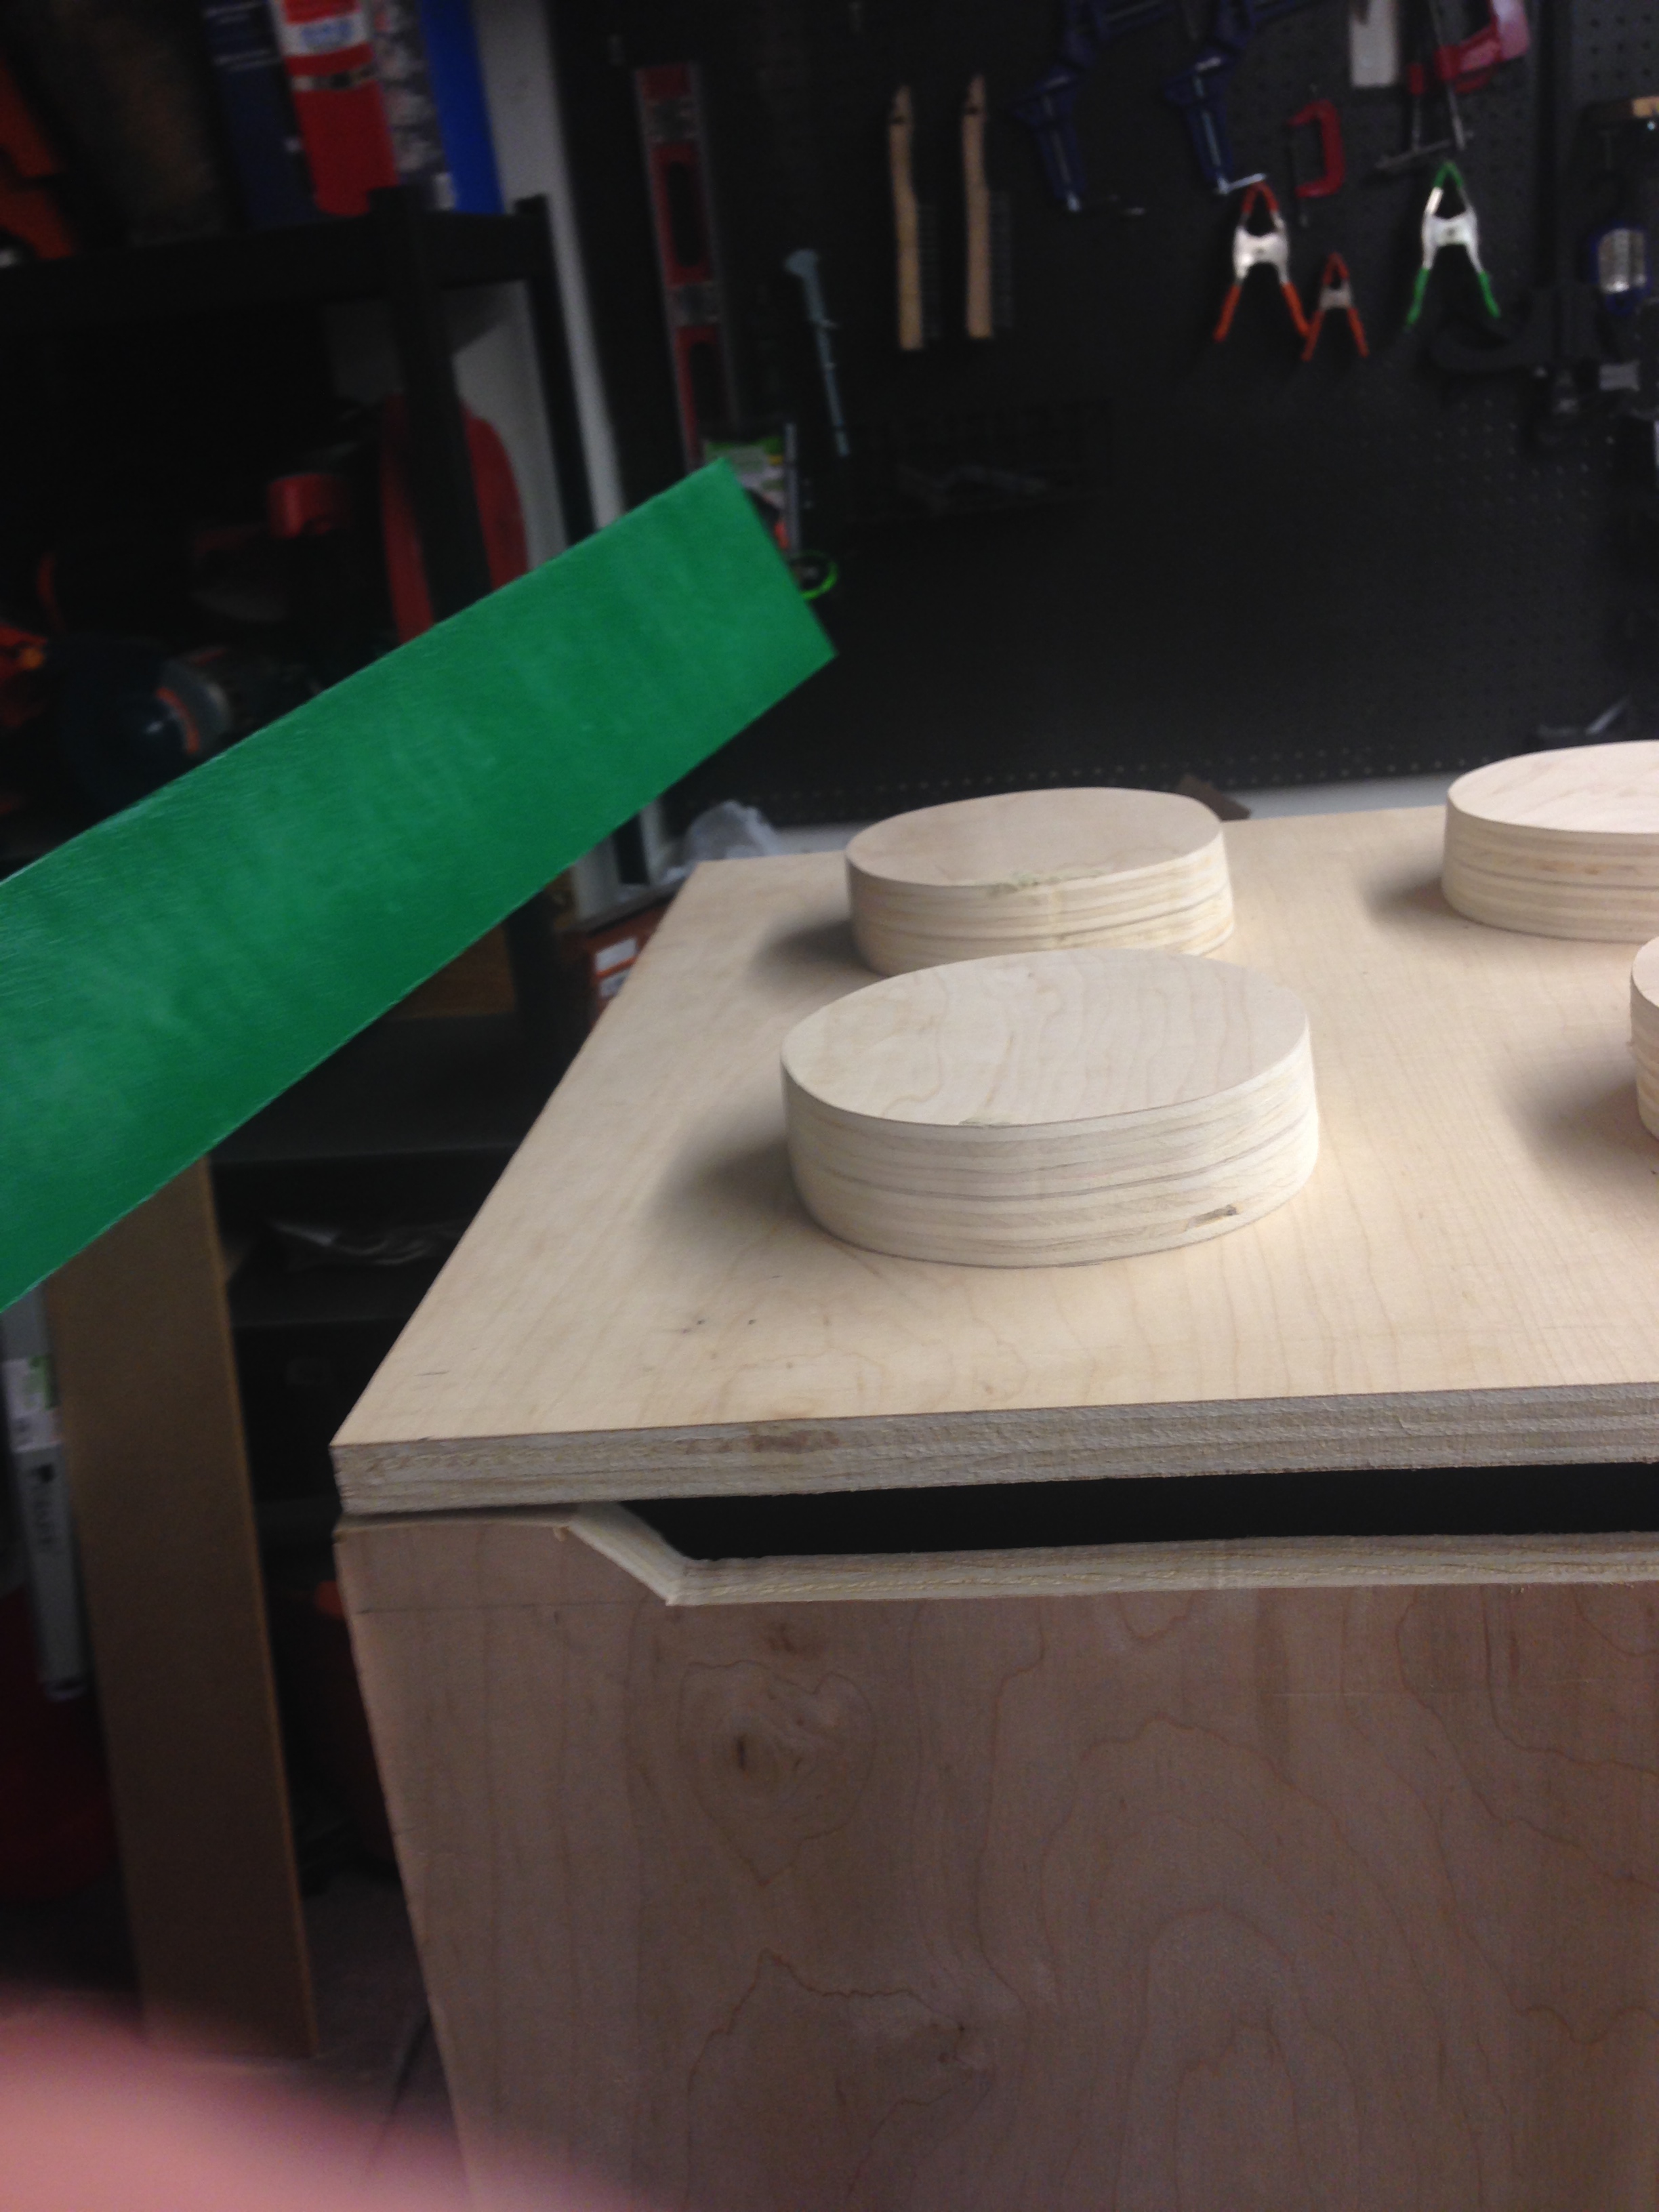
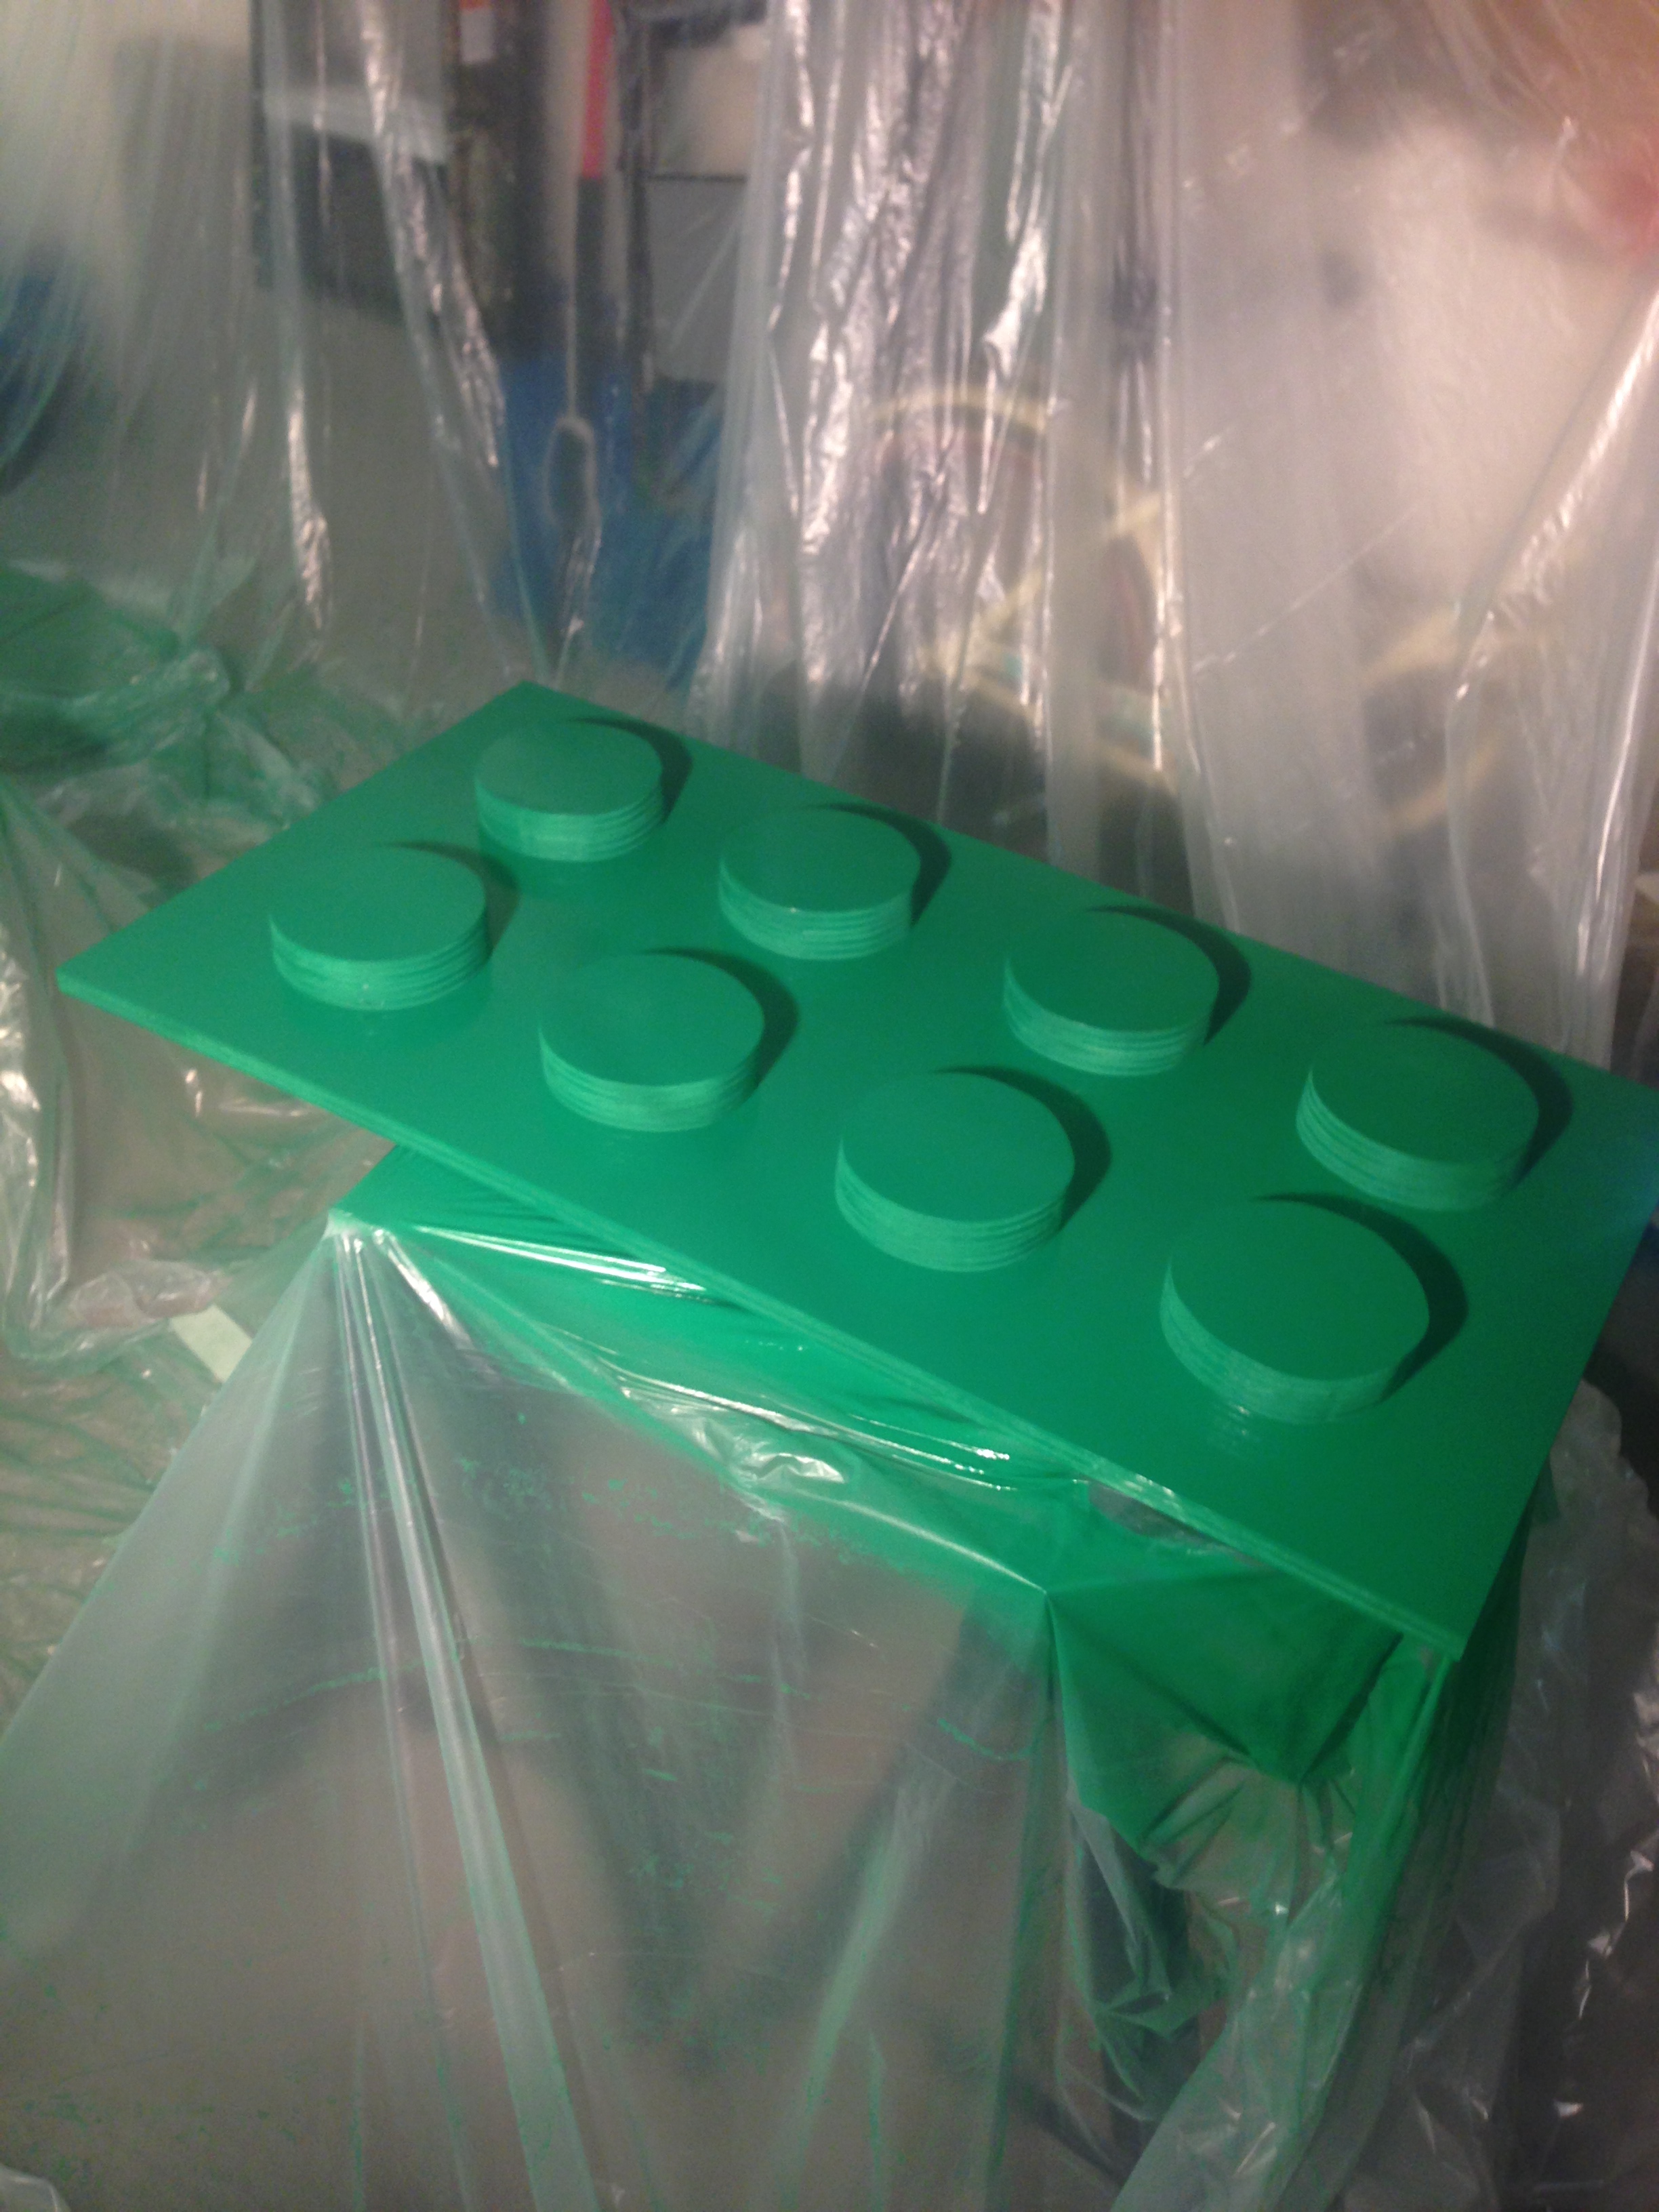
Upon calculating the measurements of the top, I figured out I had room for 8- 6″ discs on the lid all spaced evenly from the edges and between each other. With a template that I printed out from a computer I cut out 16 discs with a 6″ radius from the 3/4″ plywood scraps from cutting the sides and top of the box.

I then stacked and secured two together for the correct height ratio to the overall size of the box.
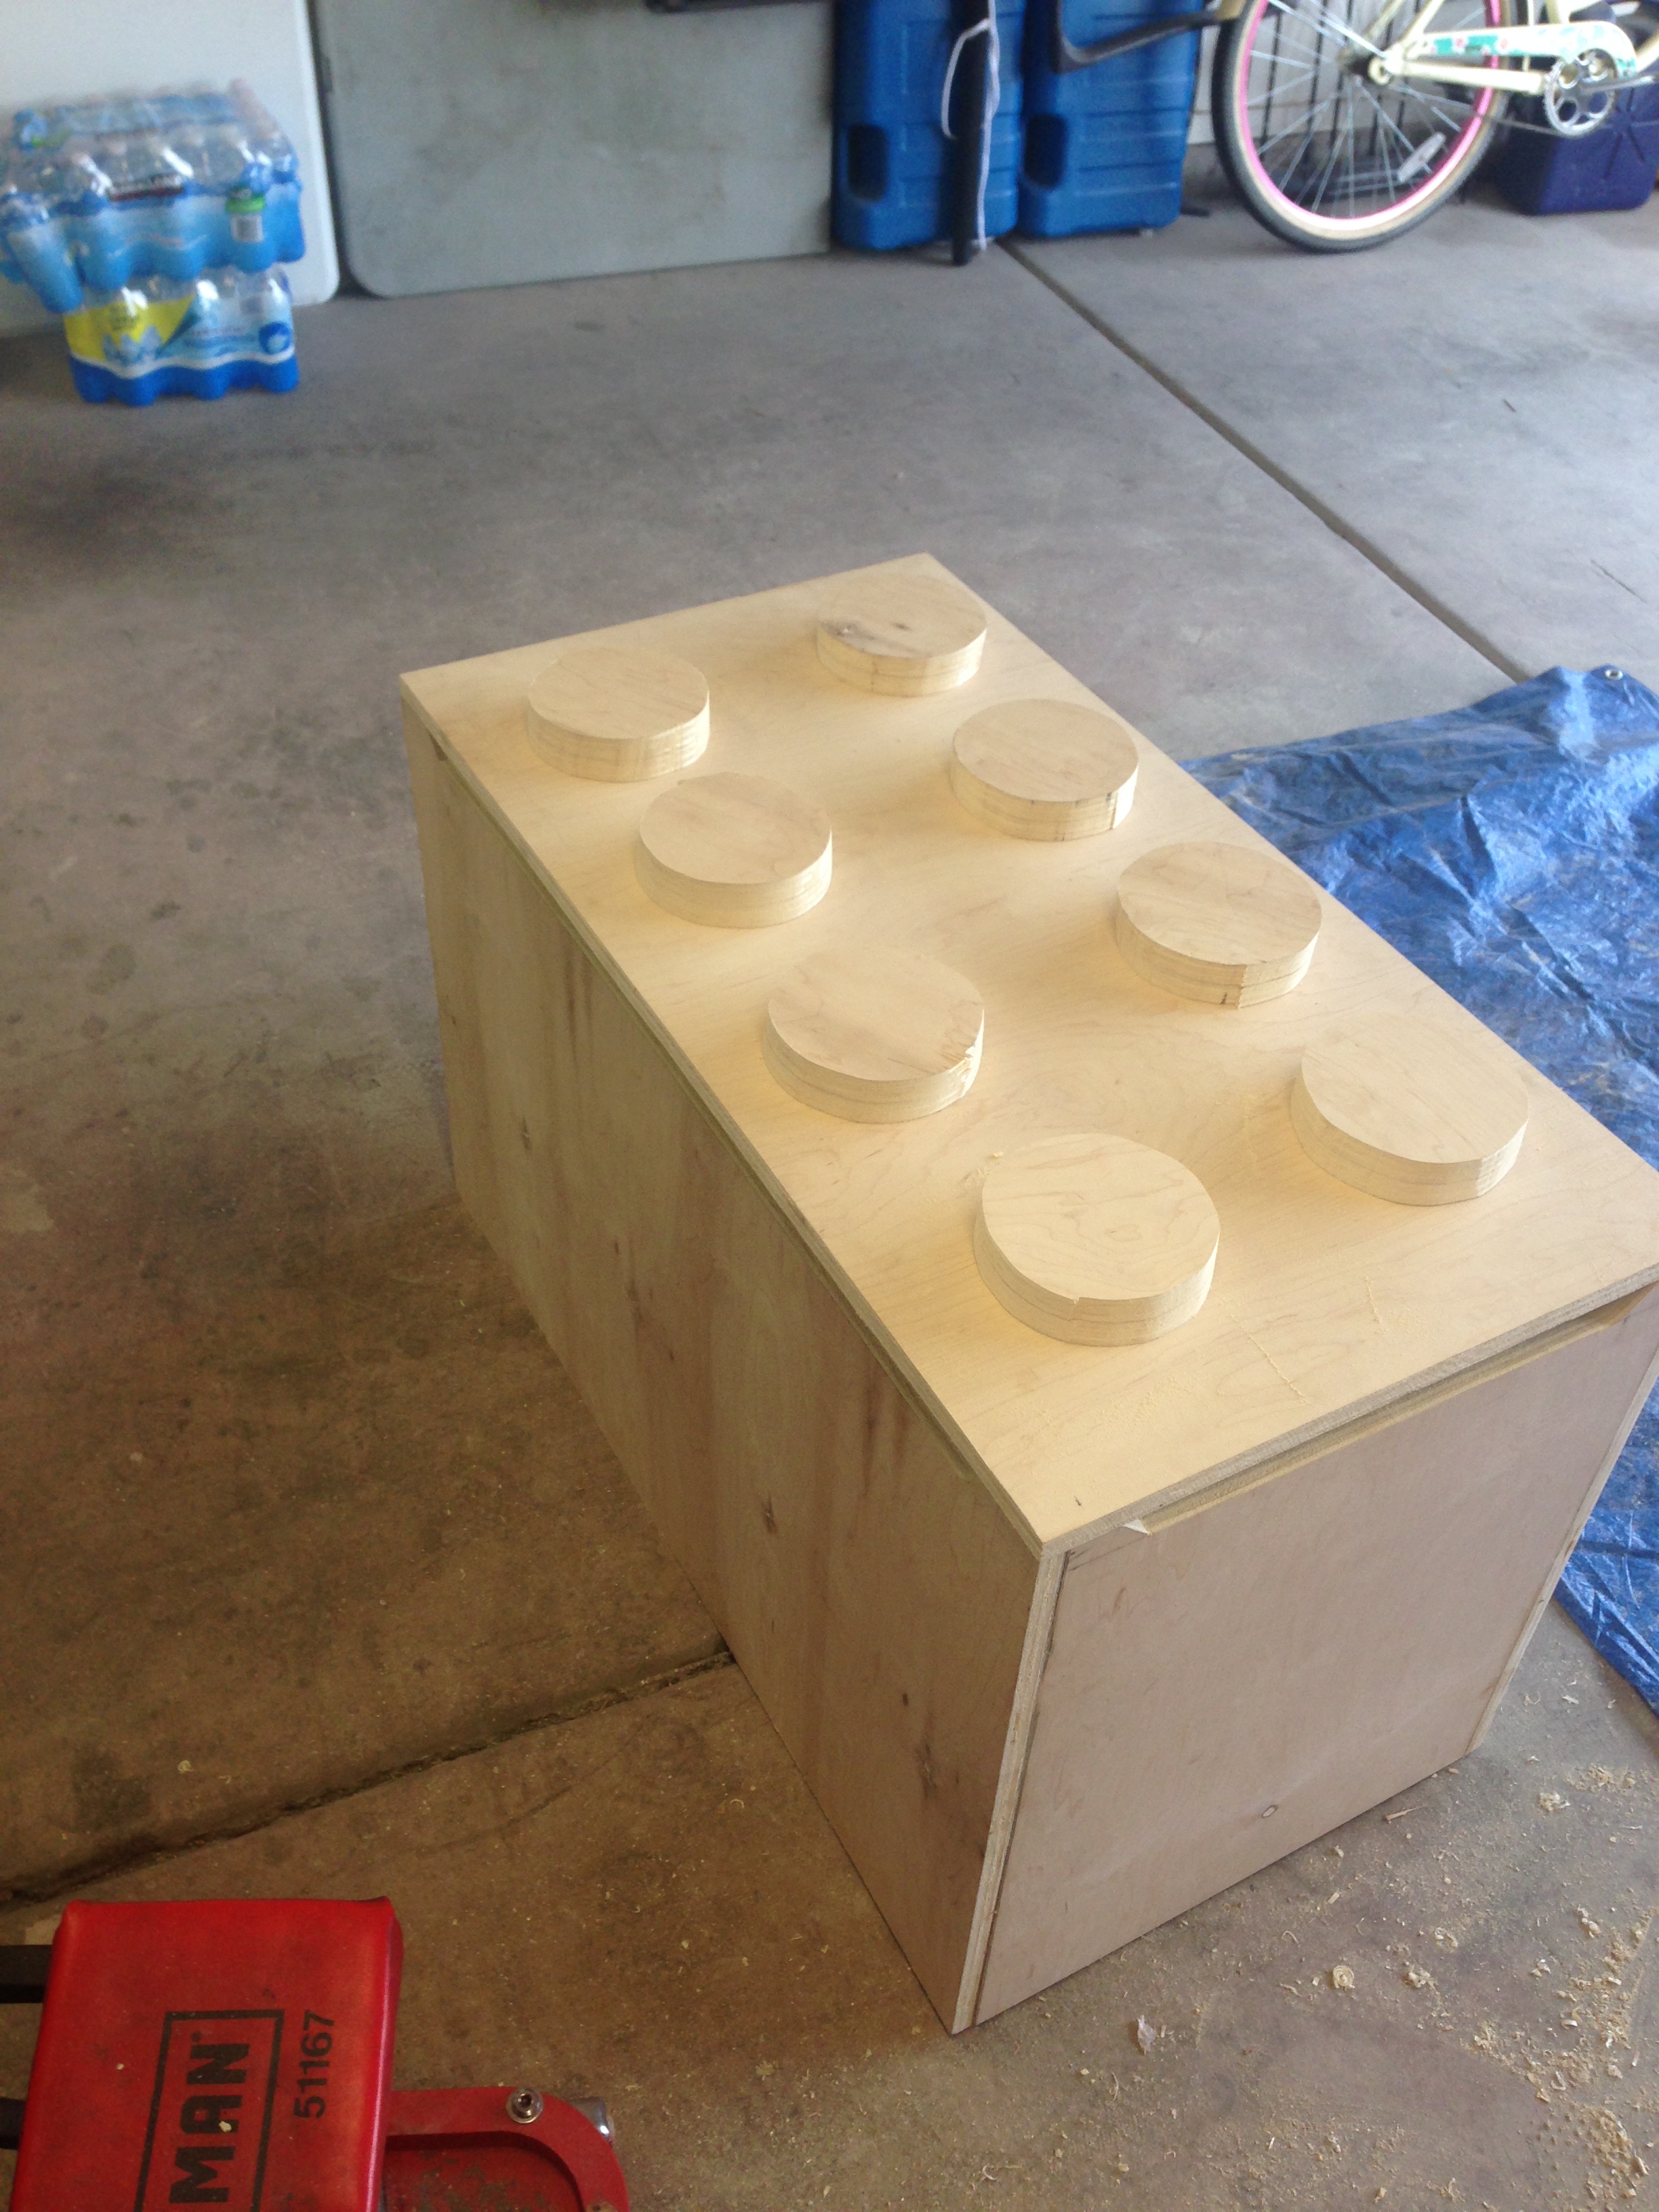
Once all the discs were secure to the top of the toy box lid I added the final middle lid support to complete the construction.
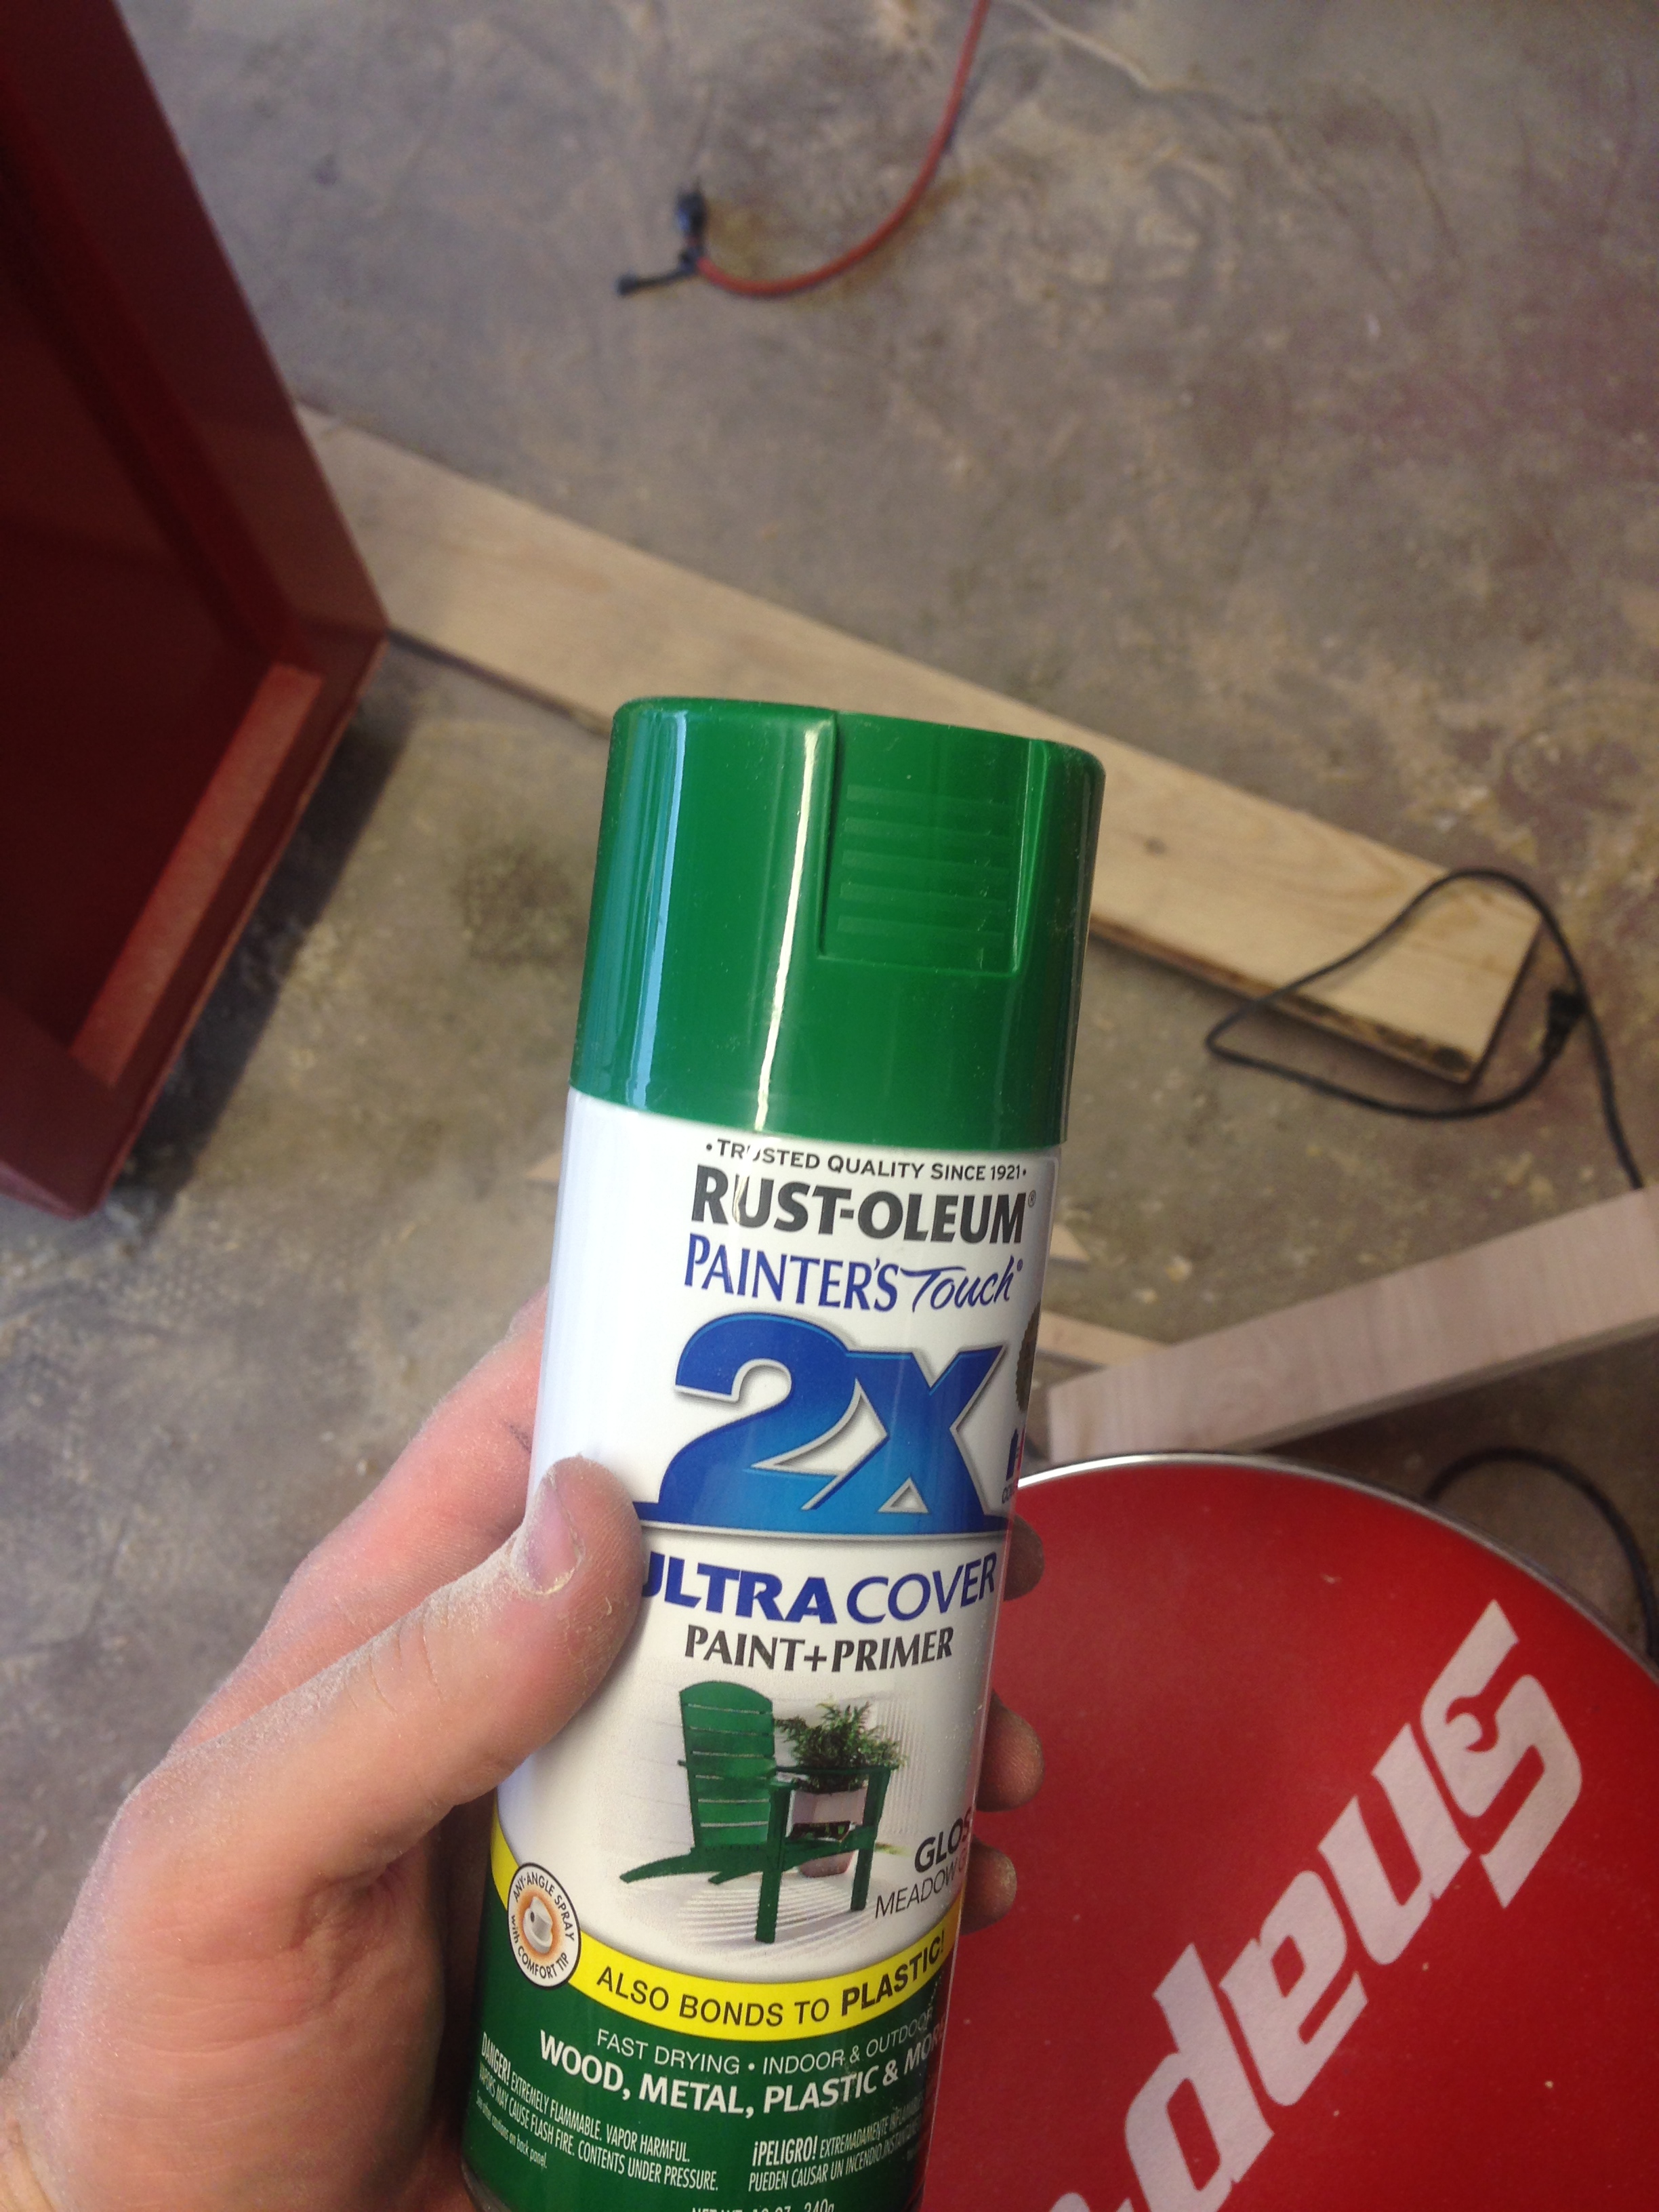
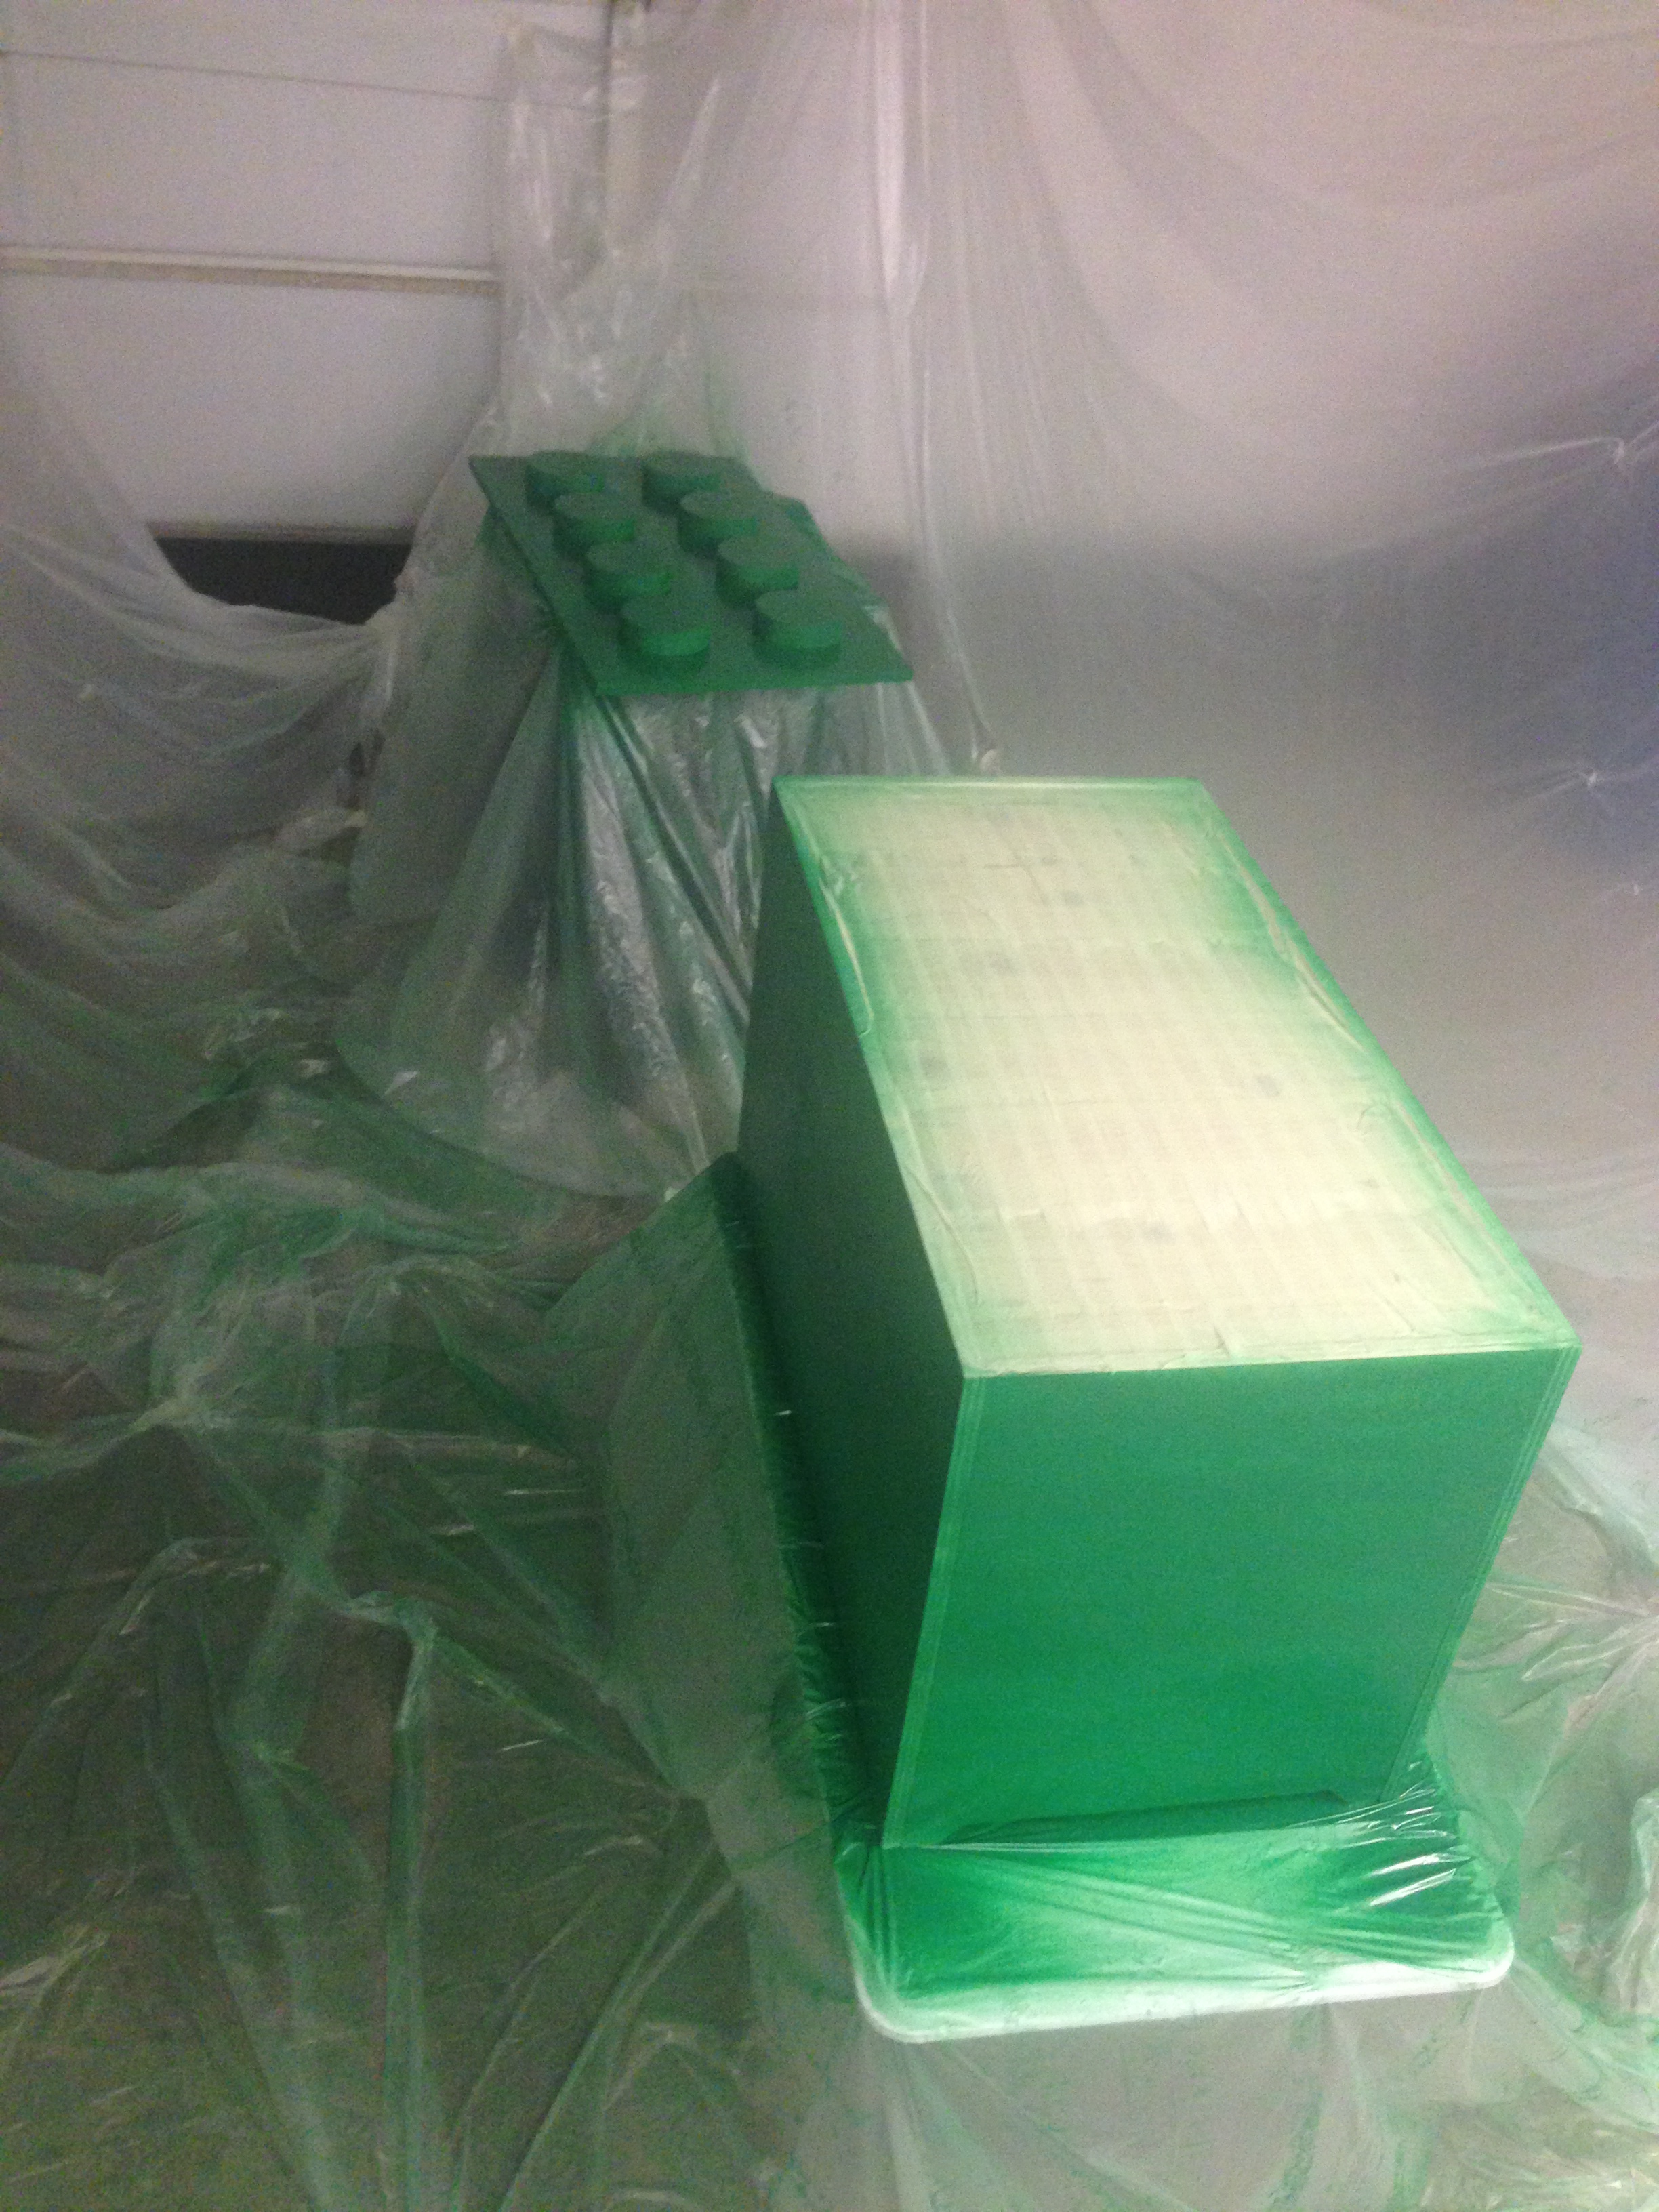
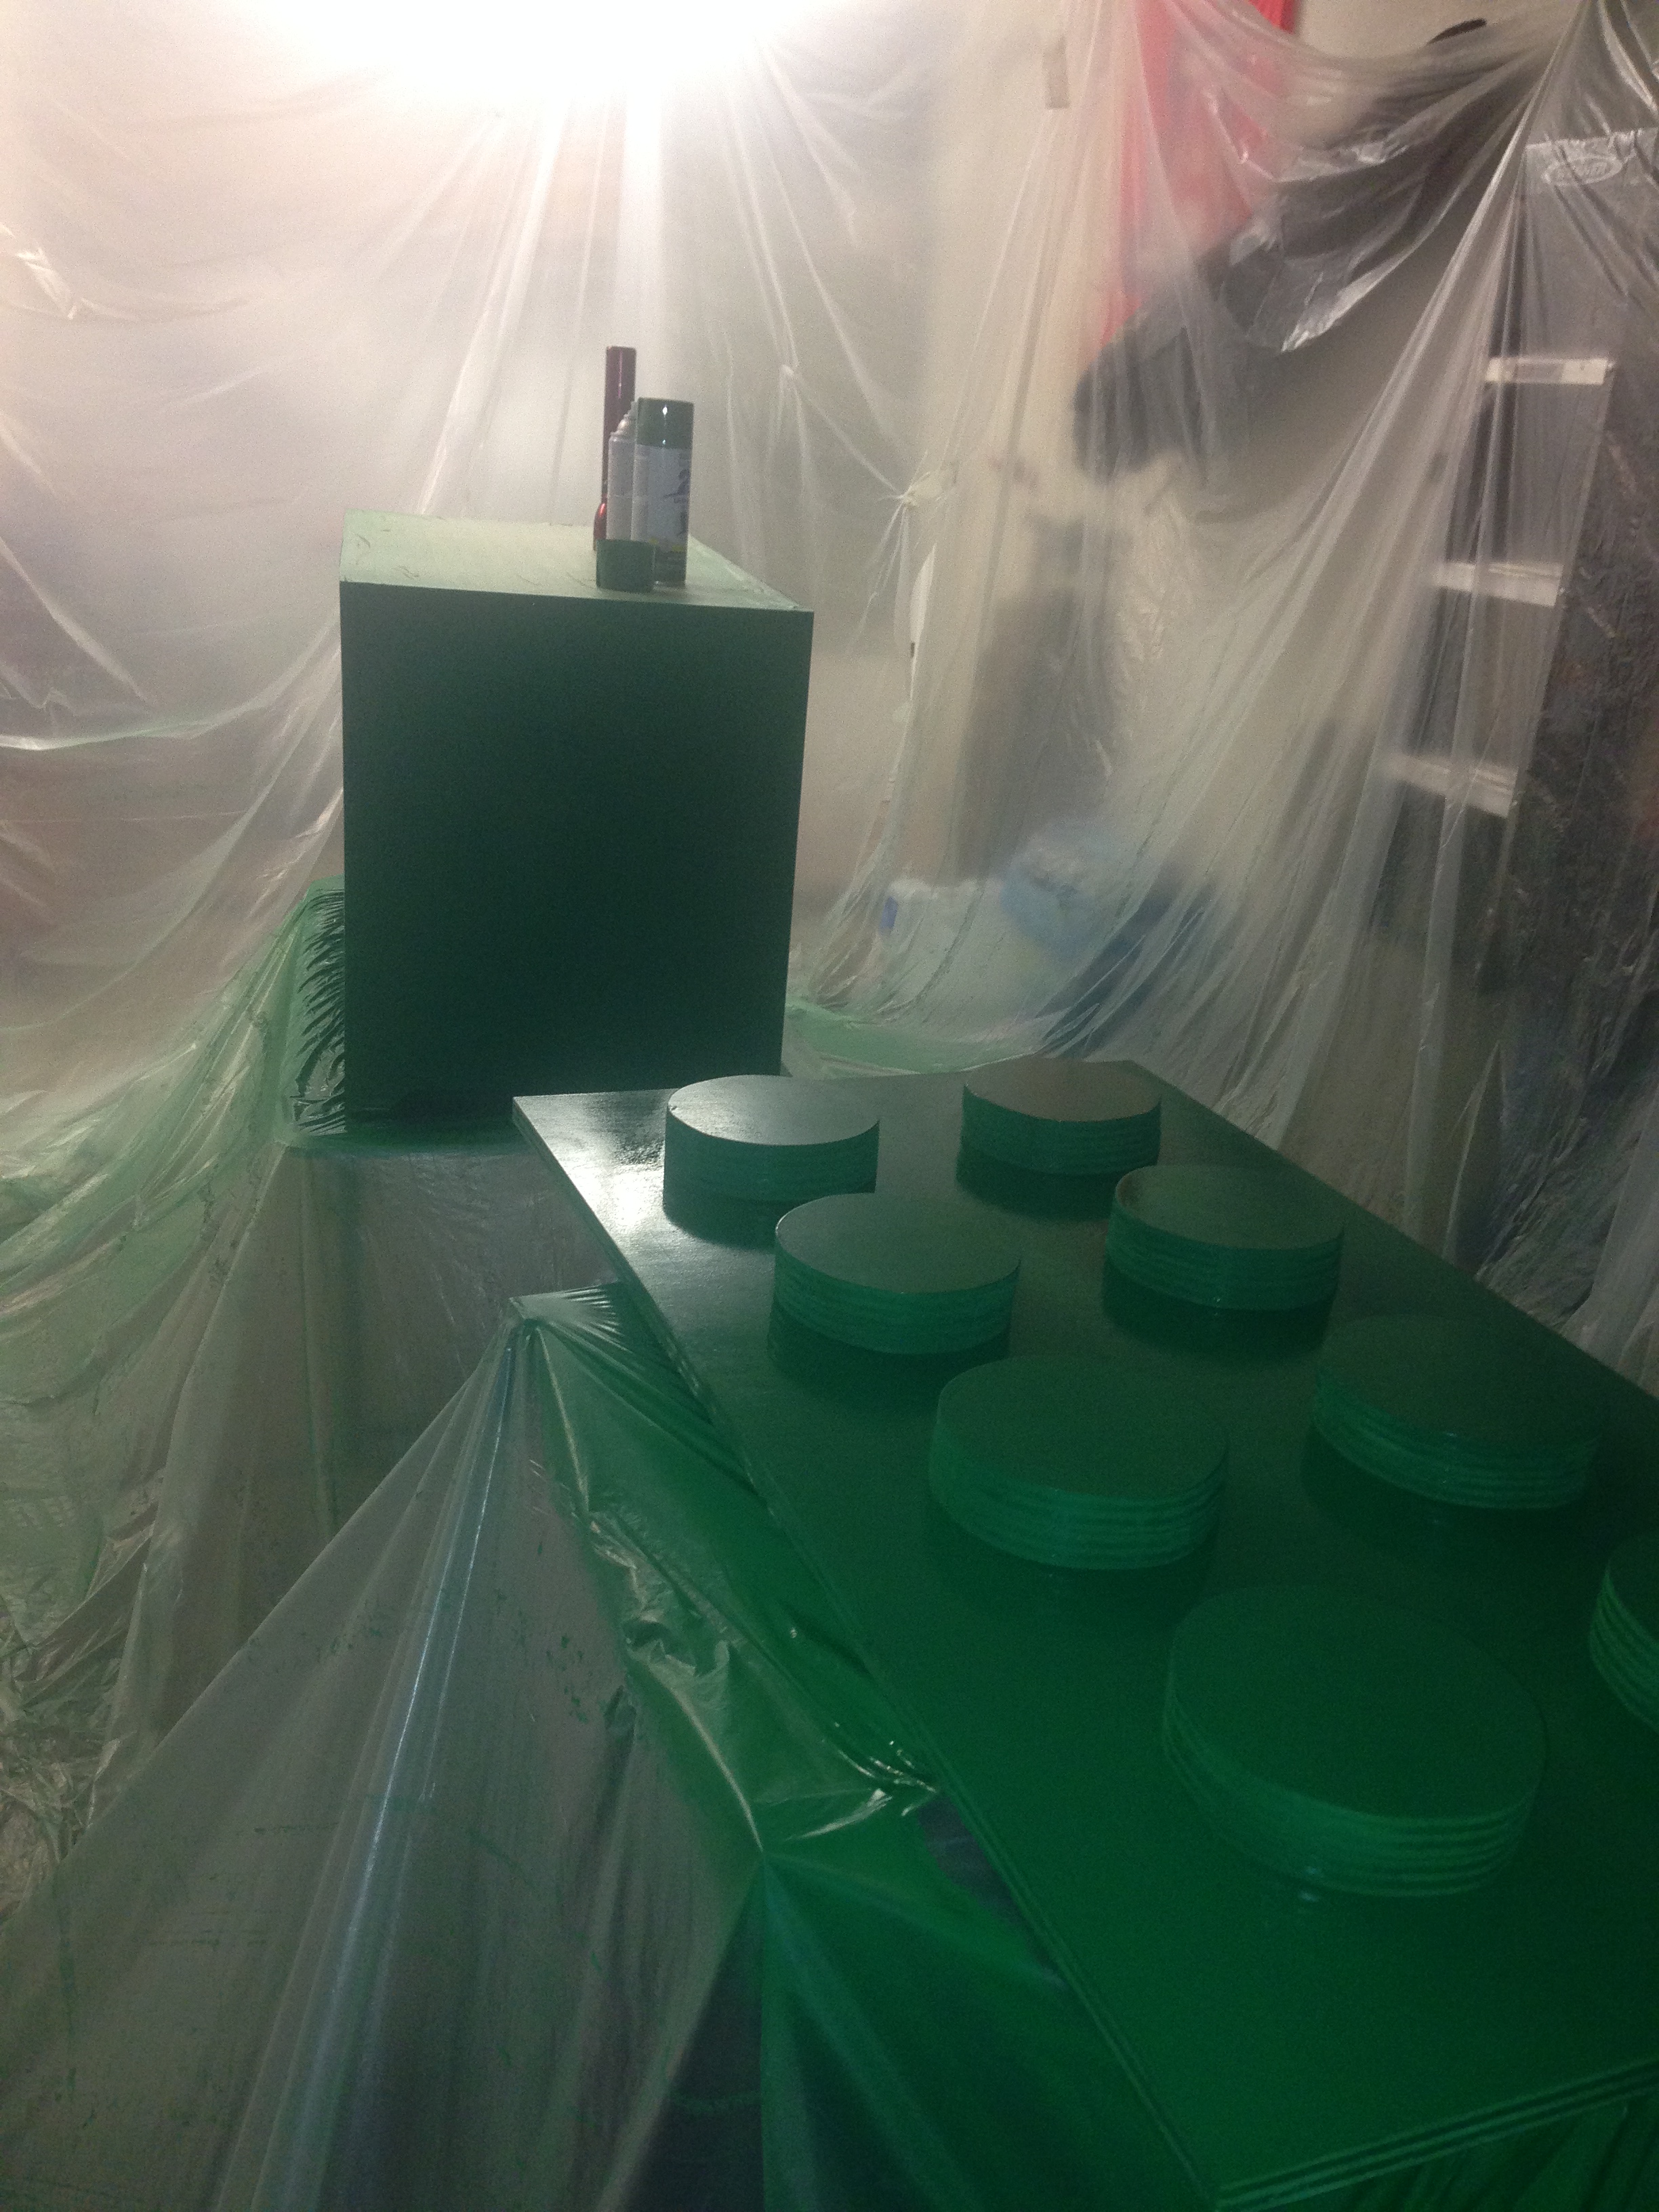
Next up, I wanted to find any imperfections and use wood filler to create an even look, sand the entire box and then paint. I decided to go with the jungle theme that my brother and sister-in-law decided for my nephew’s nursery. The Rust-oleum gloss meadow green not only matched the nursery color scheme but is also the actual color of a Lego.
After a quick test of the paint on some scrap I set up a paint booth in the garage and taped everything off. I decided to leave the planks on the bottom of the toy box and the inside unpainted so the paint would not transfer from the box to any carpet or tile or toys tossed.
After final assembly I had a toy box for my nephew’s playroom. To recap what I set out to accomplish, I wanted a toy box that was child proof and also had the clean look of a Lego block. I think I accomplished what I set out to do and as an added bonus, I will get t see my nephew grow up to use this to hold all of his most treasured toys; Can’t beat that.